

Macrame Plant Hangers from Scratch
Start your plant hanger project by making unique pots from air drying clay. No specialist tools required!
I fear this intro is going to be even more dull than the last as I’ve barely left the house in the last week. I’ve been getting some really bad headaches which I think are most likely down to either booze, coffee, or staring at my phone. Probably all three. So last week I decided to go for a long walk and give my legs and eyes some exercise. I walked to Hampstead heath, did a few socially distant laps, watched a coot build a nest on a flotation ring and marveled at how many people can’t be bothered to carry their dog poo bags to the bin and instead choose to dispose of them next to the sign that says ‘please take your dog poo home with you and put it in the bin there’. My daily step count was 19,700 steps above average that day (currently averaging 300). Charlie has invested in a hammock and figured out how to put it up in the shared garden space so as soon as I’ve finished this post I’m going to lie in the hammock, write some questions for the family pub quiz I’m hosting on Friday (which I narrowly avoided last place on last week) and drink home made lemon iced tea (cold tea, juiced lemons, sugar and ice - I’m sure you can put vodka in there too but I’m day two booze free now so why spoil it)
I’ve broken this project down into two parts so it’s a bit more manageable - pots first, followed by macrame. I’ve listed all the materials you’ll need for the whole project below so you can order everything in one go and save you waiting for the next post. If you don’t fancy the clay or want to use a watertight pot, you can just do the macrame part, which I’ll publish in the next few days.
Project time – 4+ hours making time (not including 3 days drying time)
Price – £12 - £ 20 to make 3
Pros
Working with clay is great fun!
No need for specialist tools
You can get as creative as you like
Cons
Messy!
It takes a while to get to grips with the knots
You’ll need a bit of space to work with the clay
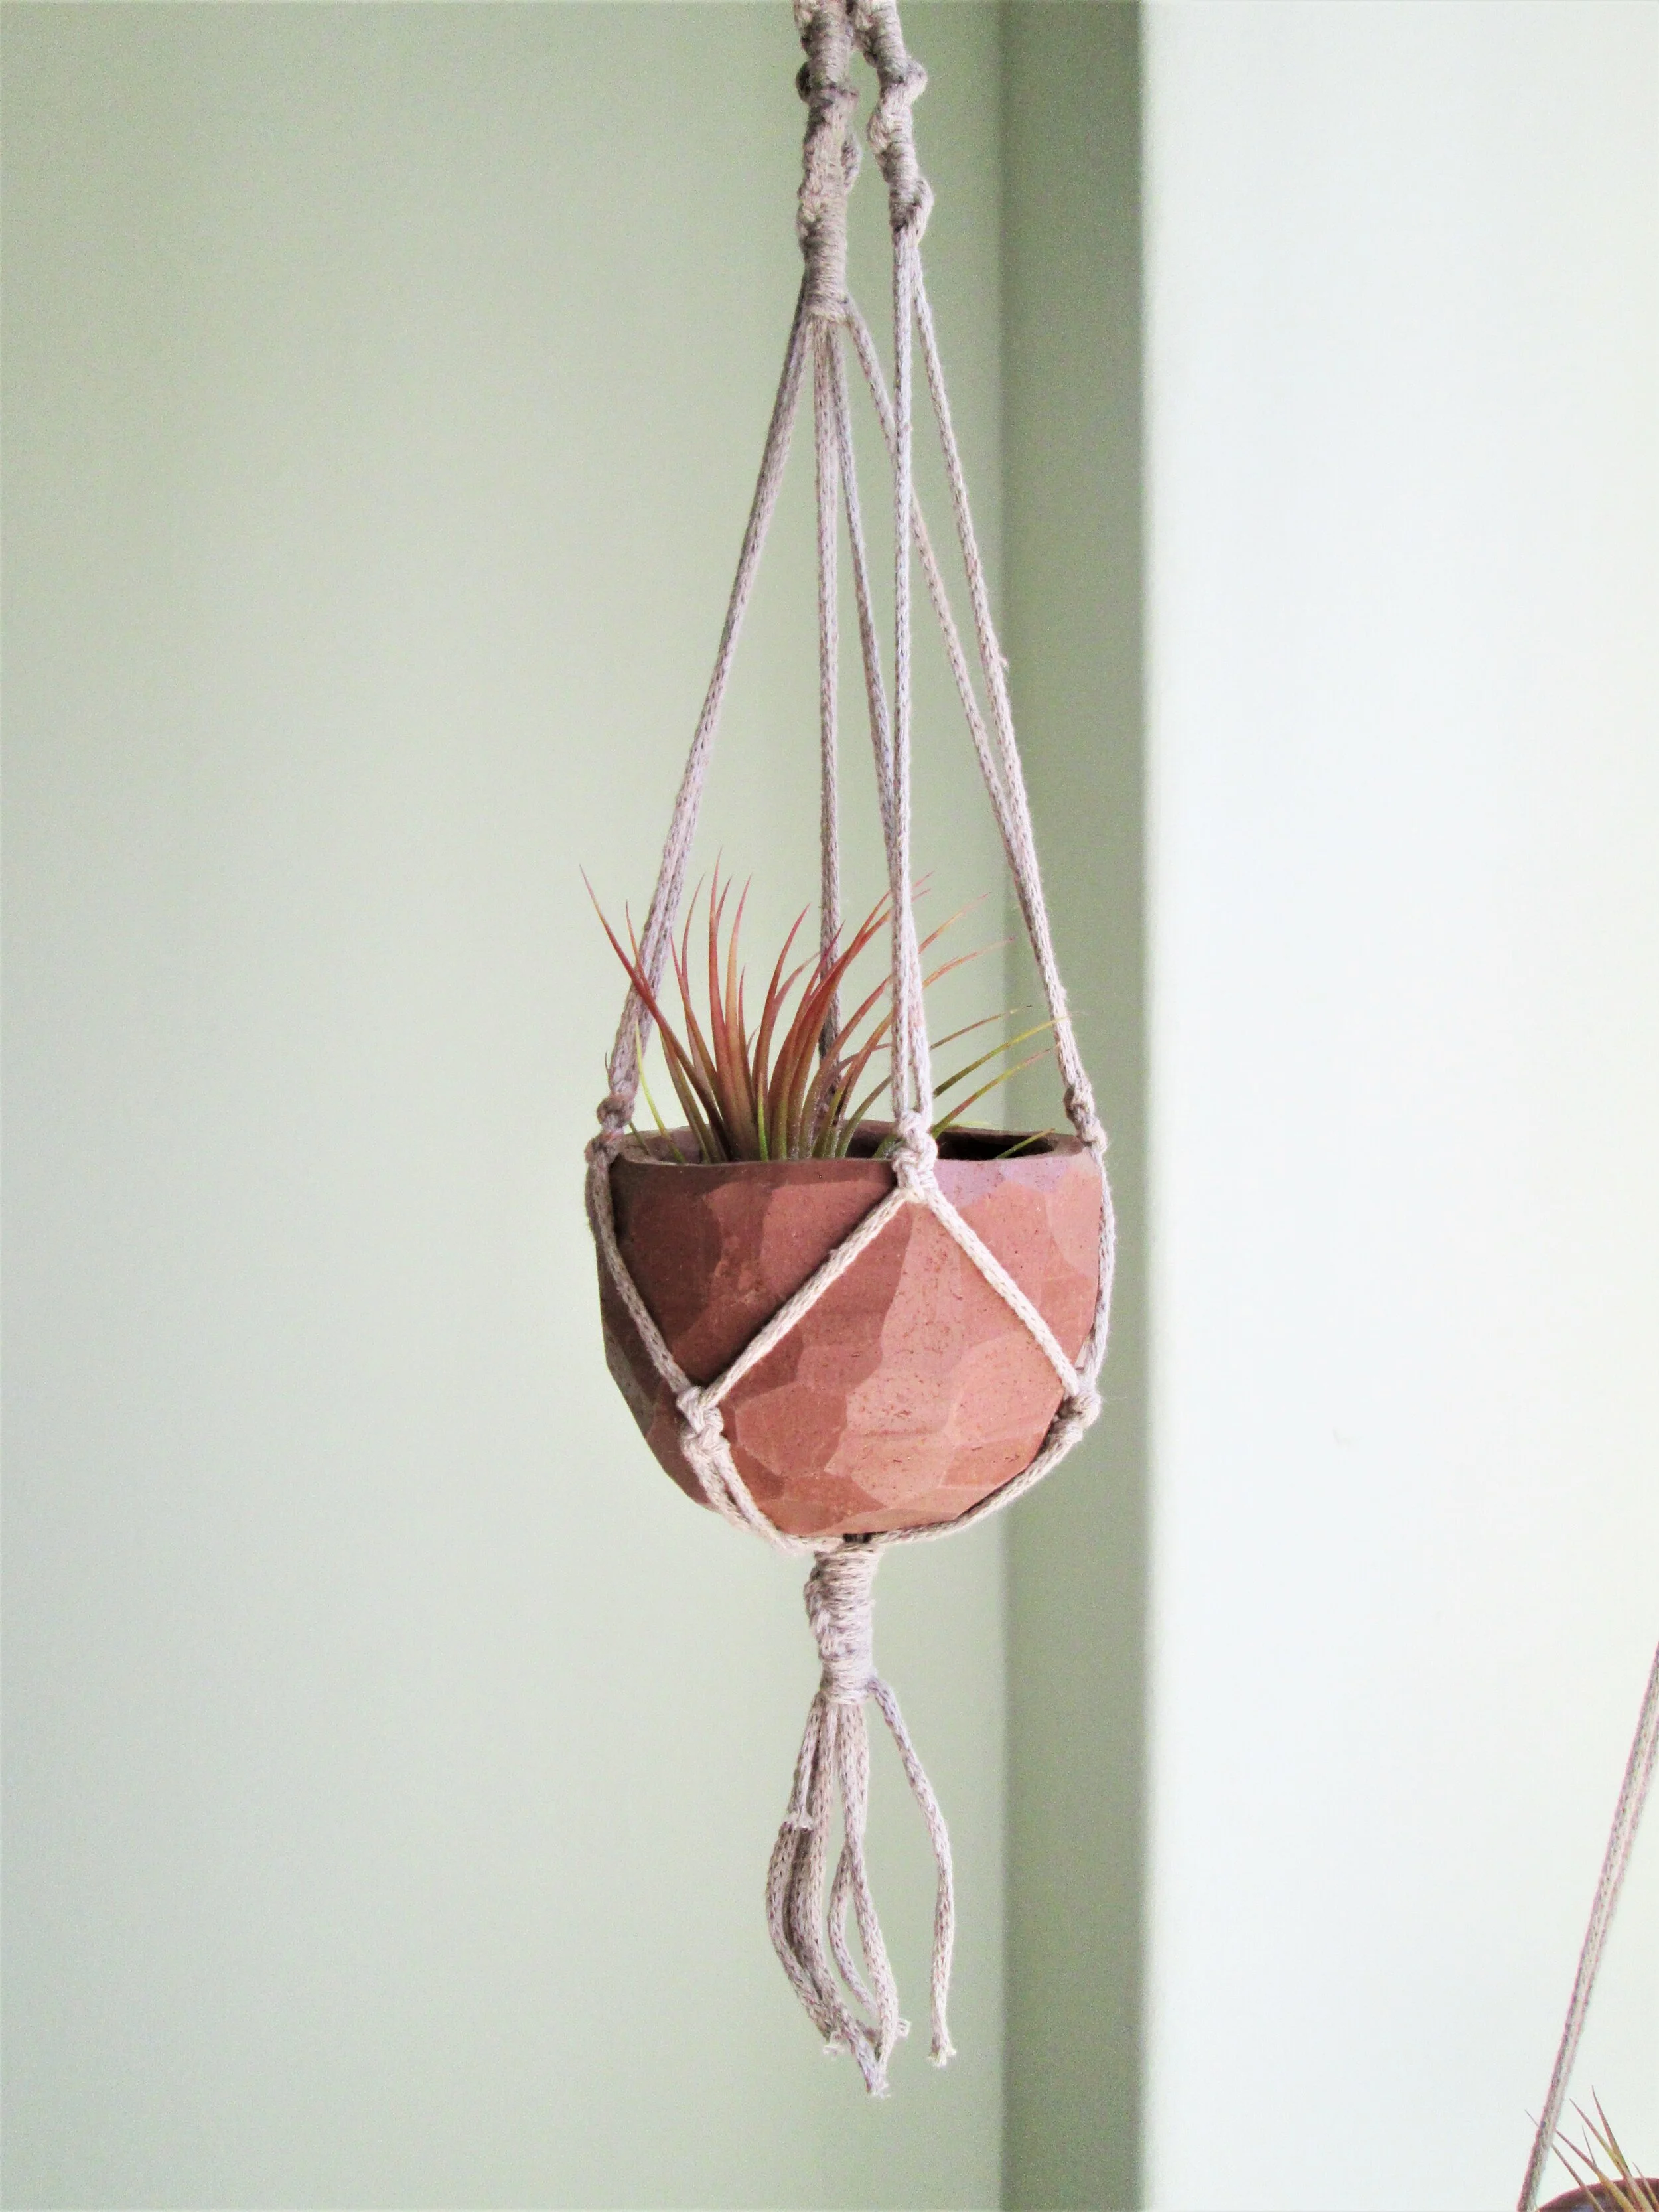
The macrame plant hanger movement has been a bit of a grower for me. I can’t say I was all that excited when they started popping up everywhere, but now I love them! I love having plants in the house (even though I kill most of the ones that enter my home) and hangers are a really nice way to make them into a bit more of a feature. As with a lot of my projects, these have a ‘rustic’ (also known as ‘made it up as I went along’) vibe. The cord I ordered was sold as macrame cord but actually isn’t that far removed from household string. If you want something a bit more finished, there are loads of cord options out there. You should also know before you embark on this project that air drying clay is not watertight so you cannot grow plants in soil in these planters. If you want to seal your clay, you can buy resin that can be painted on, but you will need to do a bit more research on that I’m afraid. I’m just growing air plants in mine so they don’t need any soil or water in the pot.
Tools
1kg Air drying clay - like this
20 metres Macrame cord - this is the one I used but for some reason the dark beige colour I ordered is no longer available. There are other colours to choose from though.
Something to make a hole in your beads - chopstick/knitting needle
Scissors
Blade if you want to make the geometric pot
Air plants - They don’t need any soil, just spray them once a week with water and they should be fine. I bought mine from the local greengrocers but they are easy to find online. These ones look nice!


I’ve split this post into 3 sections, each one showing how I made each pot. The first section shows the basic method with the subsequent sections showing how I tweaked that method to get different results.
I made 3 small pots with 1kg of air drying clay. Start by dividing your clay into the number of pots you want to make. If you want to make different sizes, divide the clay accordingly. If you want to make any little extras like beads, set some clay aside for this before you begin.
All the pots are made using the coiling technique. This is done by rolling a sausage shape with your clay and placing one coil on top of the other. I didn’t do any research before I did this and just made one long sausage and coiled that around. That seemed to work fine. If you want a less rustic pot, build the pot up one layer at a time.
You can create a ‘slip’ by watering down a bit of clay and applying a little bit in between each layer of coils if you like. This will help it stick better and is particularly useful if your clay has started to dry out. Again, I didn’t think to do this until after I’d made my pots so it should work fine without!
Work quickly with this process, the clay dries fast when it’s rolled out like this.


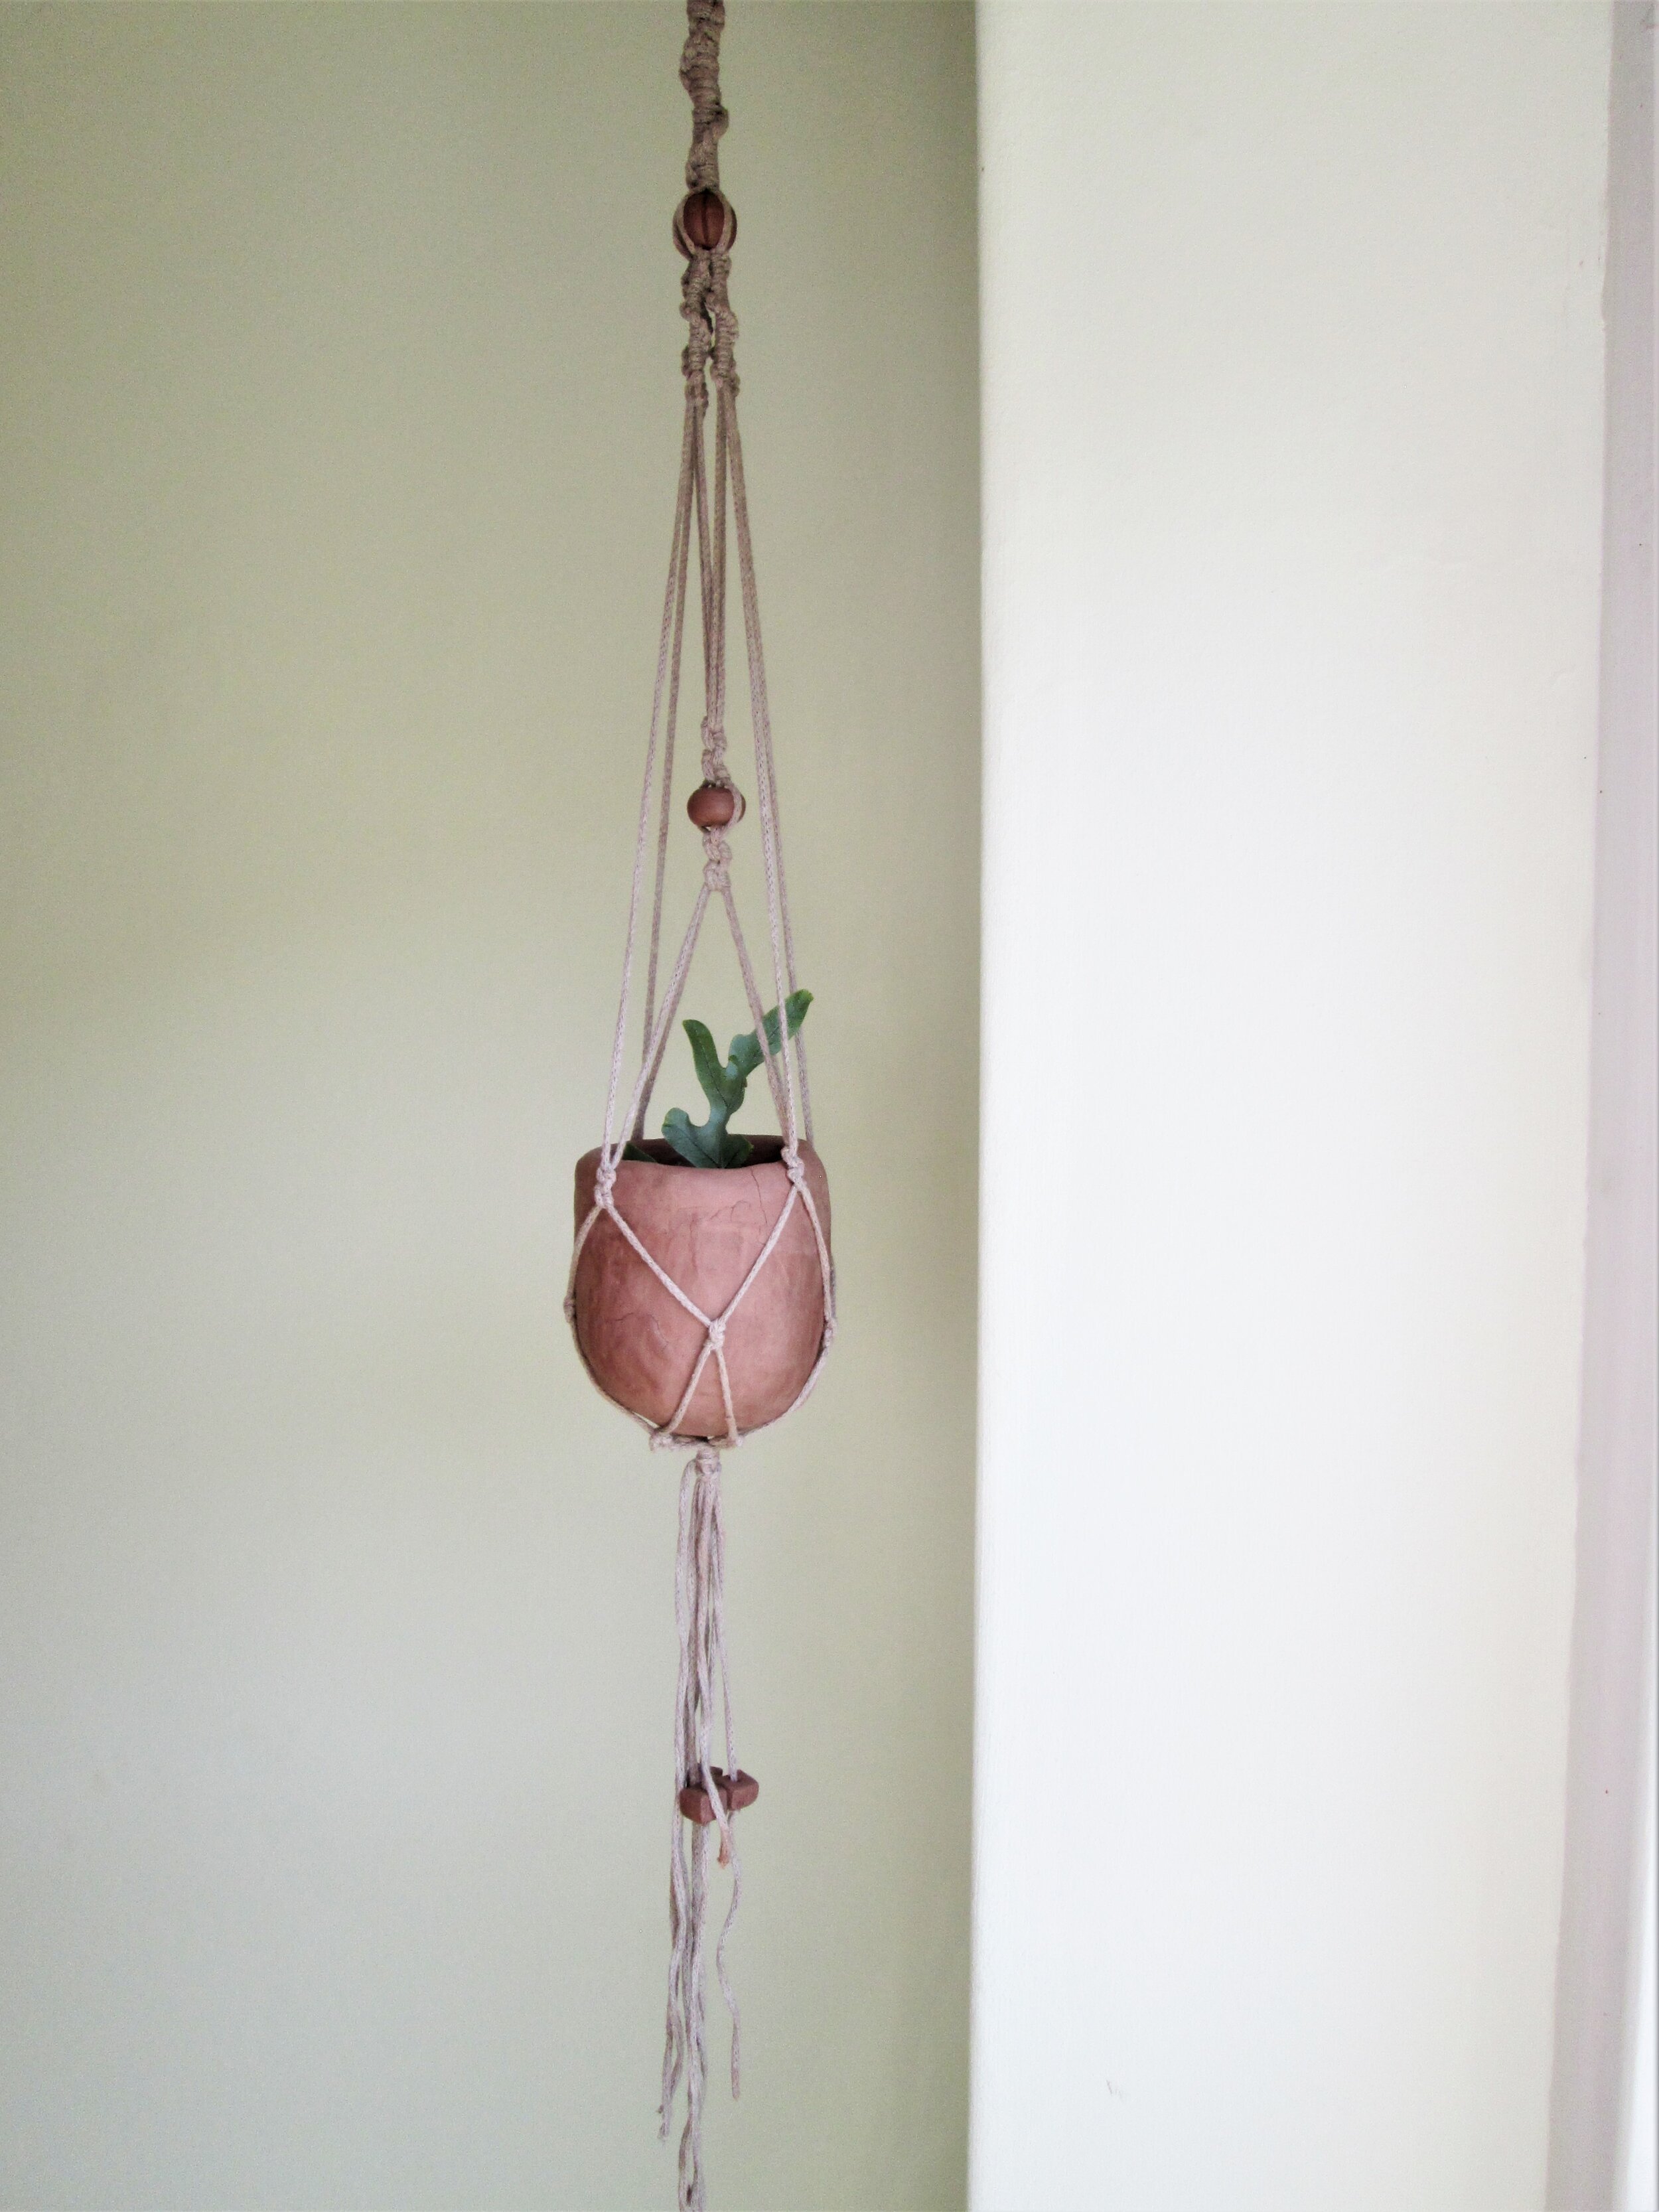
Burnished Pot
I tried a made up finishing technique for this pot when it was partially dry. There are likely better ways to get a shiny, finished surface but this one was easy and fairly effective. The pot is a bit different in that you don’t make a ‘nest’ with the macrame and instead thread the cord through holes in the pot, but as a trio, it’s nice to have that variation.

Start by rolling your sausage lengths to about 1cm thickness. I tried thinner and the pot was buckling under the weight, so be careful of that if you want thinner walls. Coil the lengths around to build up the sides of your pot until you have the size you want.

Use your fingers to smooth all the layers together on the inside and outside of your pot. The smoother the better.

When I’d finished smoothing, I decided the mouth of the pot was too big so I sliced a triangle out of the side and closed it up. If you’re not happy with your pot at all at this stage, you can still re-roll it and start again, just be careful not to let the clay dry out too much.

When you’re happy with the shape of your pot, mark your three hole placements at equal distances apart. Don’t make the holes too close to the top because there will be a lot of pressure here if your pot is heavy. Push a knitting needle or chopstick through the clay to make the hole and tidy it up on the edges with your fingers.

Leave your pot to dry for 10 - 20 hours (I left it overnight) somewhere cool and then burnish the surface with the back of a spoon. The video below shows the process in a bit more detail. Don’t leave it too long to do the burnishing, if it’s too dry it won’t work. When you’ve finished, leave to dry fully for two more days. Don’t leave your pots to dry in direct sunlight as this may cause them to crack.

Geometric Pot
I built this pot in exactly the same way but tried a different finishing technique to try and get a more geometric look. It’s really satisfying slicing away the layers of clay so try not to get too carried away!

Build your pot in exactly the same way using the coiling technique and then leave it to dry overnight, same as above. When it’s partially dry, start slicing away at angles on the surface of your pot using a big, sharp blade like these. Be careful not to go too thin on the edges. If you cut away too much and make a hole, I think the best thing to do would be to finish slicing away at the rest of the pot and then attach some fresh clay to that area with slip when you’ve finished. Let it dry again overnight and then tidy it up.
If you want a more uniform geometric pattern, it may work to make the sides of the pot much thicker and slice away bigger, more considered chunks.
When you’ve finished, let your pot dry completely for another two days.
The pot that went wrong!
As I mentioned above, air drying clay is not watertight in the same way as glazed, fired ceramics. So for this pot I tried to build in a watertight layer. Except I didn’t think about the fact that as water evaporates from the clay, the pot shrinks. In conclusion, don’t use this method!
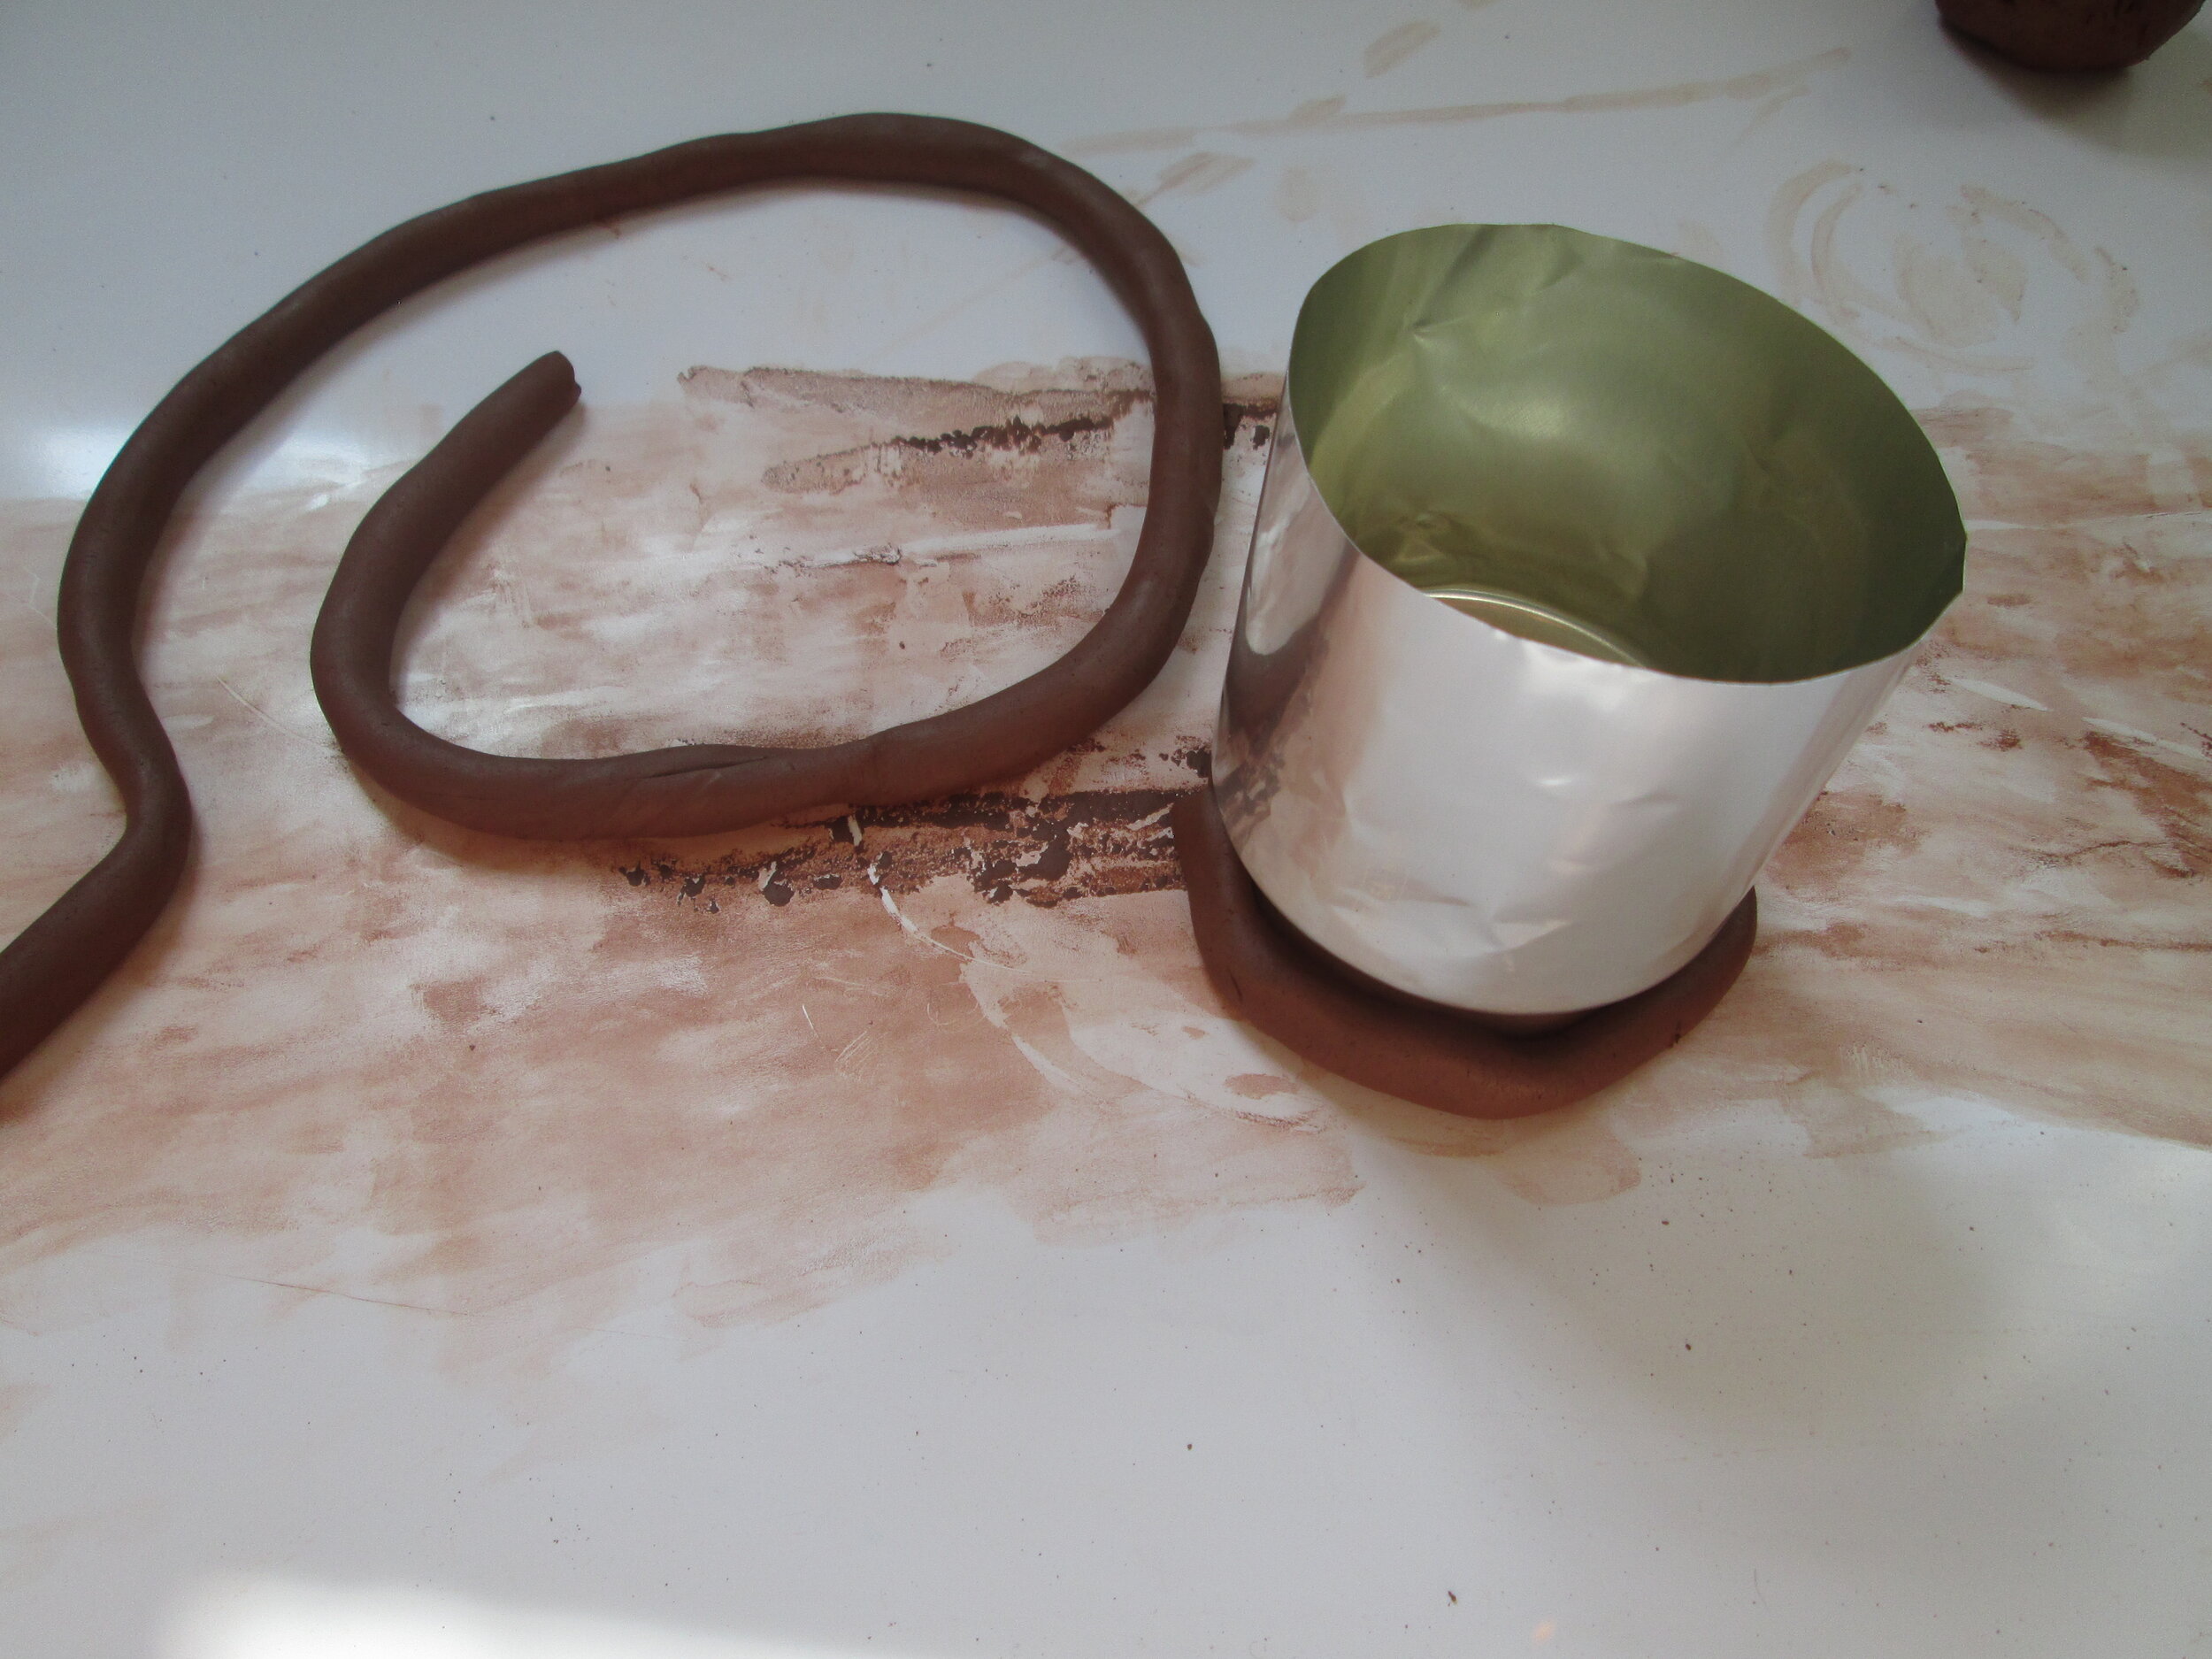
I started by cutting a beer can to the height I wanted for my pot.

And then coiled my clay around the can, building it up and over the top. I smoothed it off and let it dry in the same way as the others.
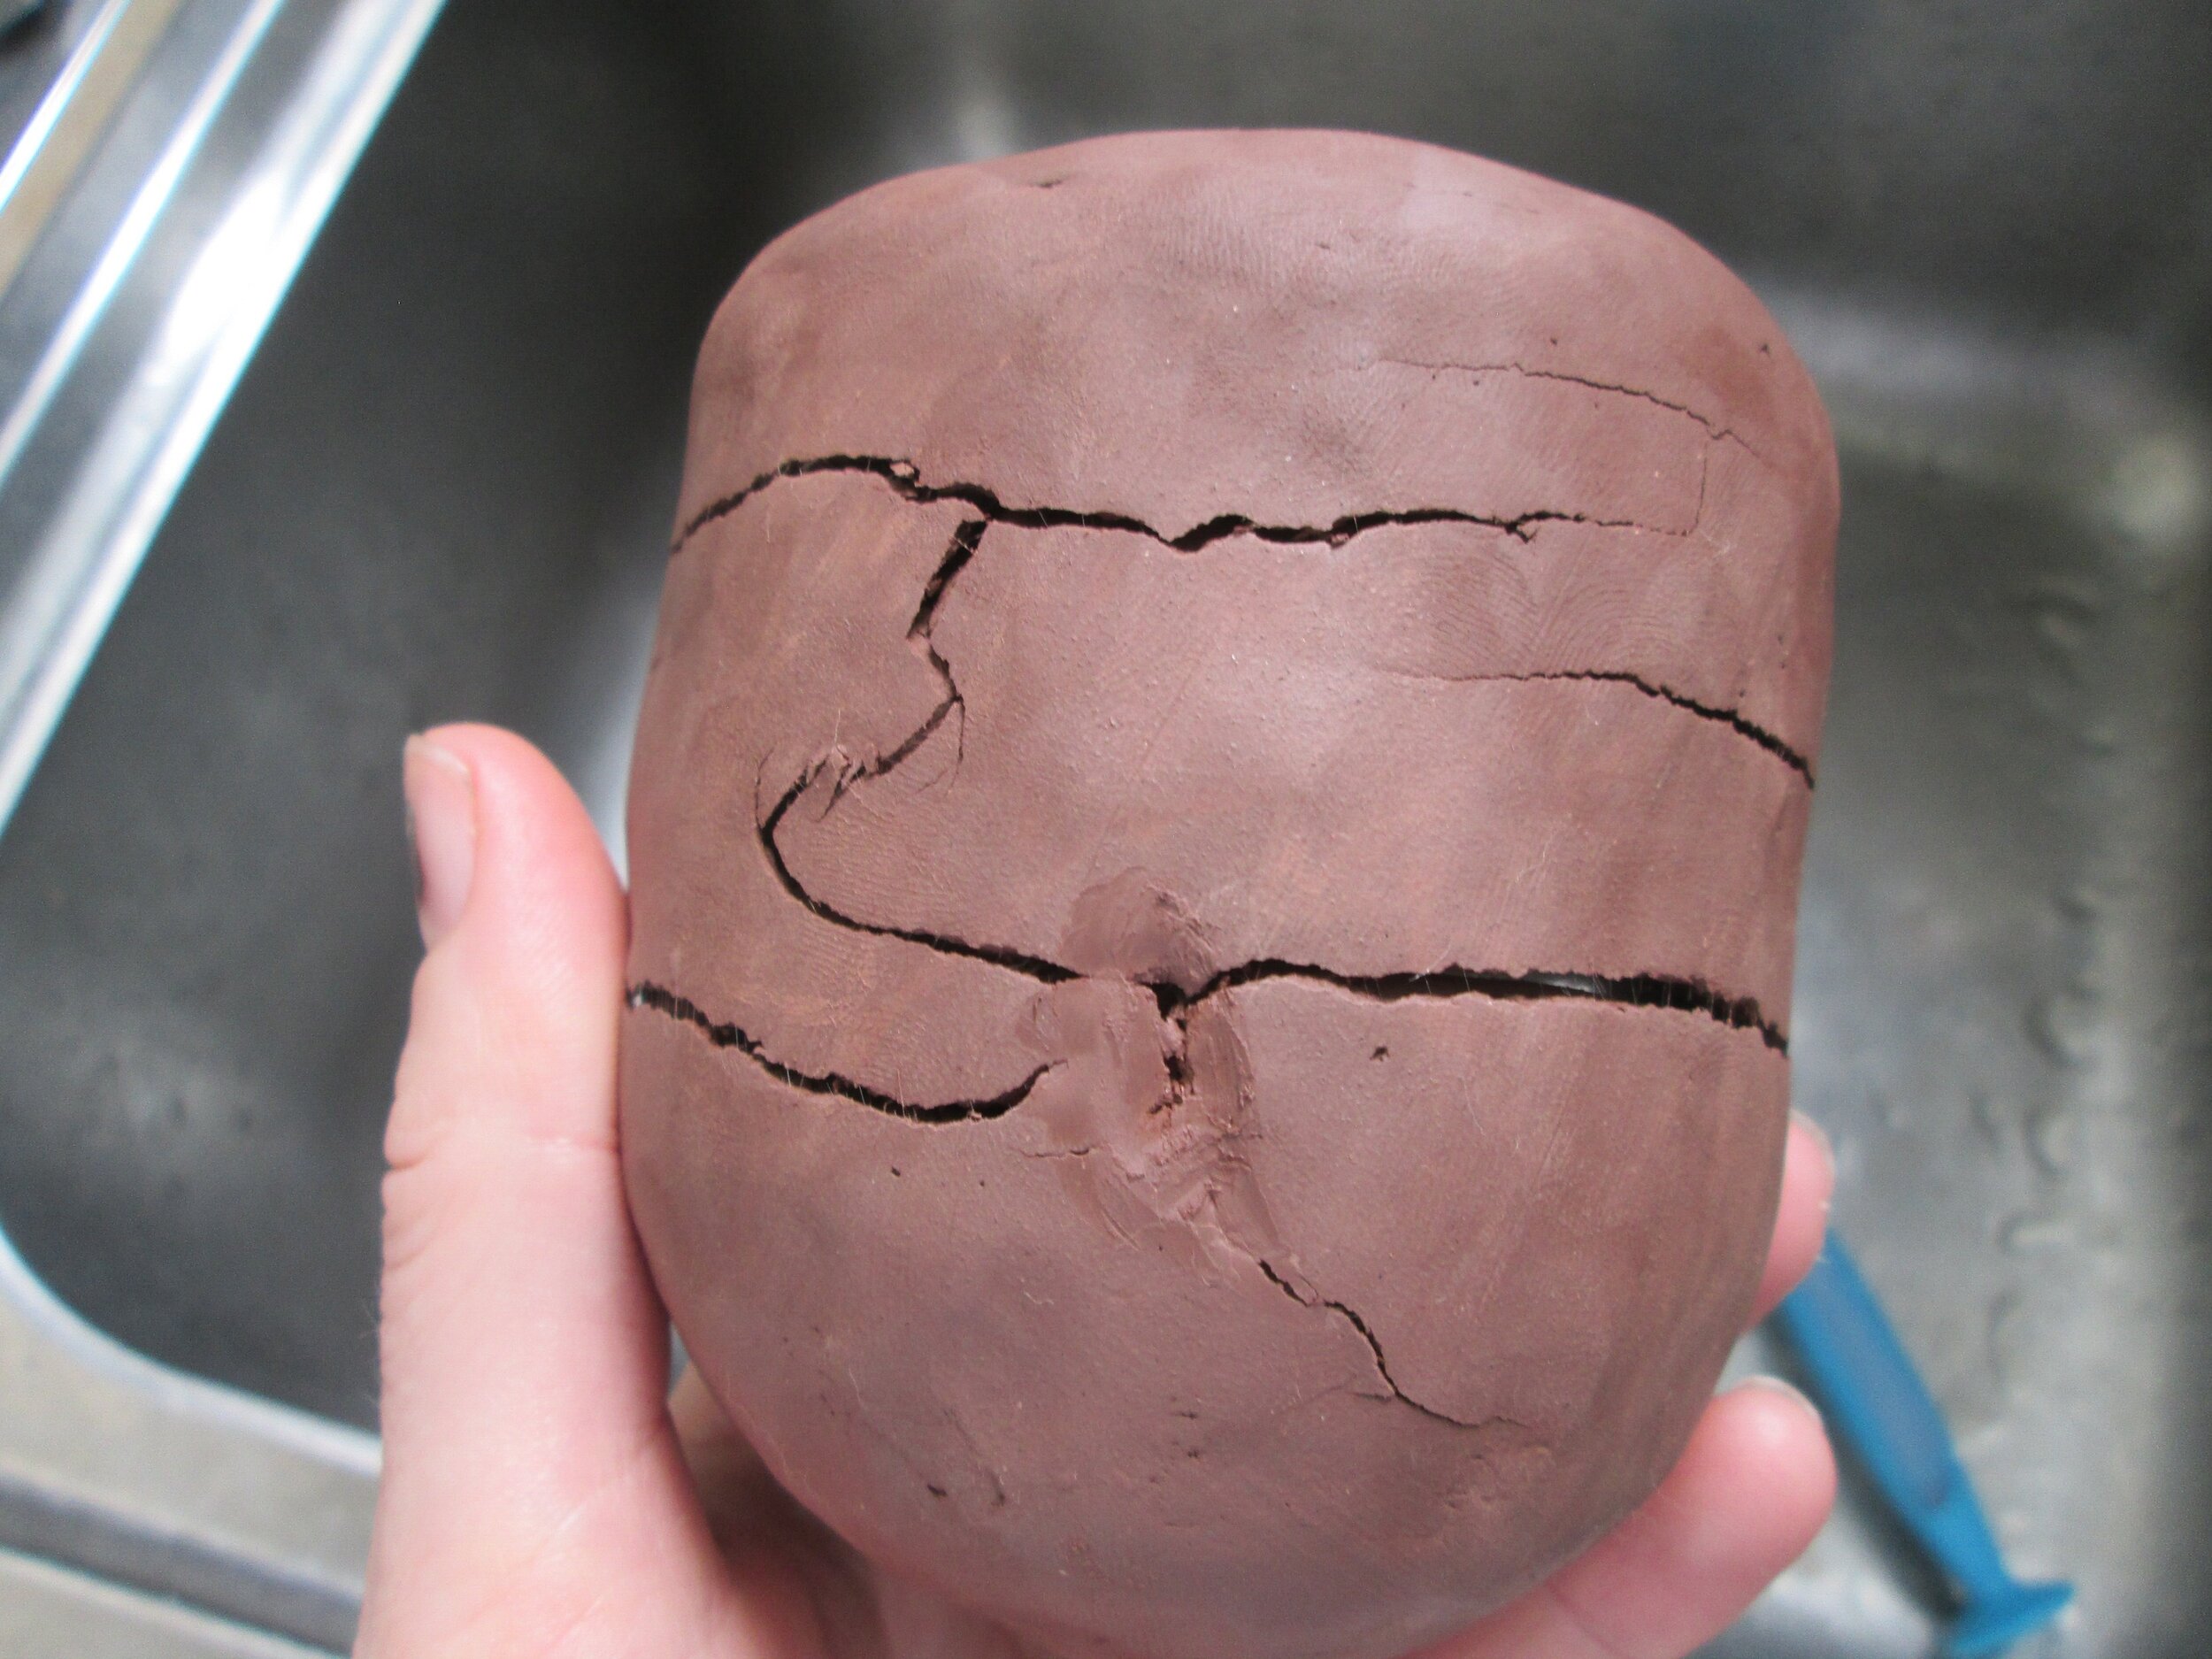
And this was what I found in the morning! The pot had shrunk as it dried and with nowhere to go, it cracked.

I tried filling all the cracks with clay again but found I had to repeat this every hour or two as new cracks kept appearing. It has managed to hold together but I suspect as it dries out fully over time it will slowly disintegrate. It might work better if you build your pot around a watertight vessel but make it slightly bigger, so when it dries the vessel can fit inside.

Beads
The beads were made simply by rolling a chunk of clay into a sphere and making a hole using a chopstick. Your holes may need 4 or more threads to fit through them so make sure they’re wide enough.
So that’s it for the pots! I’ll post part two in the next couple of days which will show the different knots I used to do the macrame parts and how I got the different cross-over styles. I only used two types of knot but there are endless resources online for making plant hangers so have a look around and see what knots you like best.If you have any questions, post them below and I’ll get back to you asap. Hope you enjoy this project!