

Make Colourful Leopard Print Hoops
This one is a bit fiddly and may take a bit of practice to get them perfect. But if you choose some colours you really like, you’ll be happy however they come out!
I’d really like to introduce each post with some interesting stories about my life, but as is the case for most of us right now…I don’t have much going on! I feel like I’m starting to settle into lockdown life a bit and have managed to arrange something resembling a routine. I’m not a morning person so I usually get up at about 9.30 and spend an hour or so waking up, drinking coffee, reading the news, scrolling aimlessly. I have grand plans for a re-brand and an overhaul of the workshops but I’m really struggling to find the motivation to work on that at the moment so most of my productive energy is going into the blog and a google digital garage course I’m enrolled on. My friend Katy suggested I write myself a schedule when I was having a particularly down day so now we have a checklist on the side of the fridge listing a few things that we’d like to achieve every day. I rarely complete every day but it feels good to tick things off. They’re pretty basic activities but they all add up and help maintain my mental and physical health a bit - blog/online course, read, yoga, walk, something creative, phone a friend, phone free time. All things I should probably have been doing every day before lockdown!
Charlie was off work all Easter weekend so we managed to get out into a bit of overgrown garden space that is shared between all the flats. We cleared a bit of space between the nettles and managed to ID one of the plants as three cornered leek. Invasive and edible - so we can help ourselves guilt free! Charlie responsibly let me try some first insisting one of us had to be alive to take me to the hospital..but we’re both still breathing so I think they might be a go-er. If onion supply chains break down, you know where to find me. (side note - if you’re going to eat anything you find in the garden, be completely sure you’ve identified it correctly and ideally ask an expert. Also make sure it hasn’t been sprayed with herbicide. Or pooped on. I was 100% sure I knew what this plant was). Anyway…here’s what I made this week…
Project time – 1 - 2 hours
Price – About £5 - £12
Pros
You only need a small space to work
No need for specialist tools
You can get as creative as you like
Cons
Can be a bit fiddly
I haven’t tested how robust they are…you might not be able to just chuck them in your make-up bag without stressing
This project came about when I was getting particularly twitchy, looking for ways to entertain myself. Charlie had some Fimo hanging around and offered it to the cause. Fimo has a real nostalgic vibe for me, I haven’t played with it since I was ten when I would make pointless ornaments and ugly beads (a particularly sad looking elephant ornament springs to mind!?). I made some simple hoops at first and showed them to a friend who asked if I could try leopard print. I tried a couple of different techniques and landed on this one. Although it’s not the simplest, it does come up with nice irregular spots which is what I was after
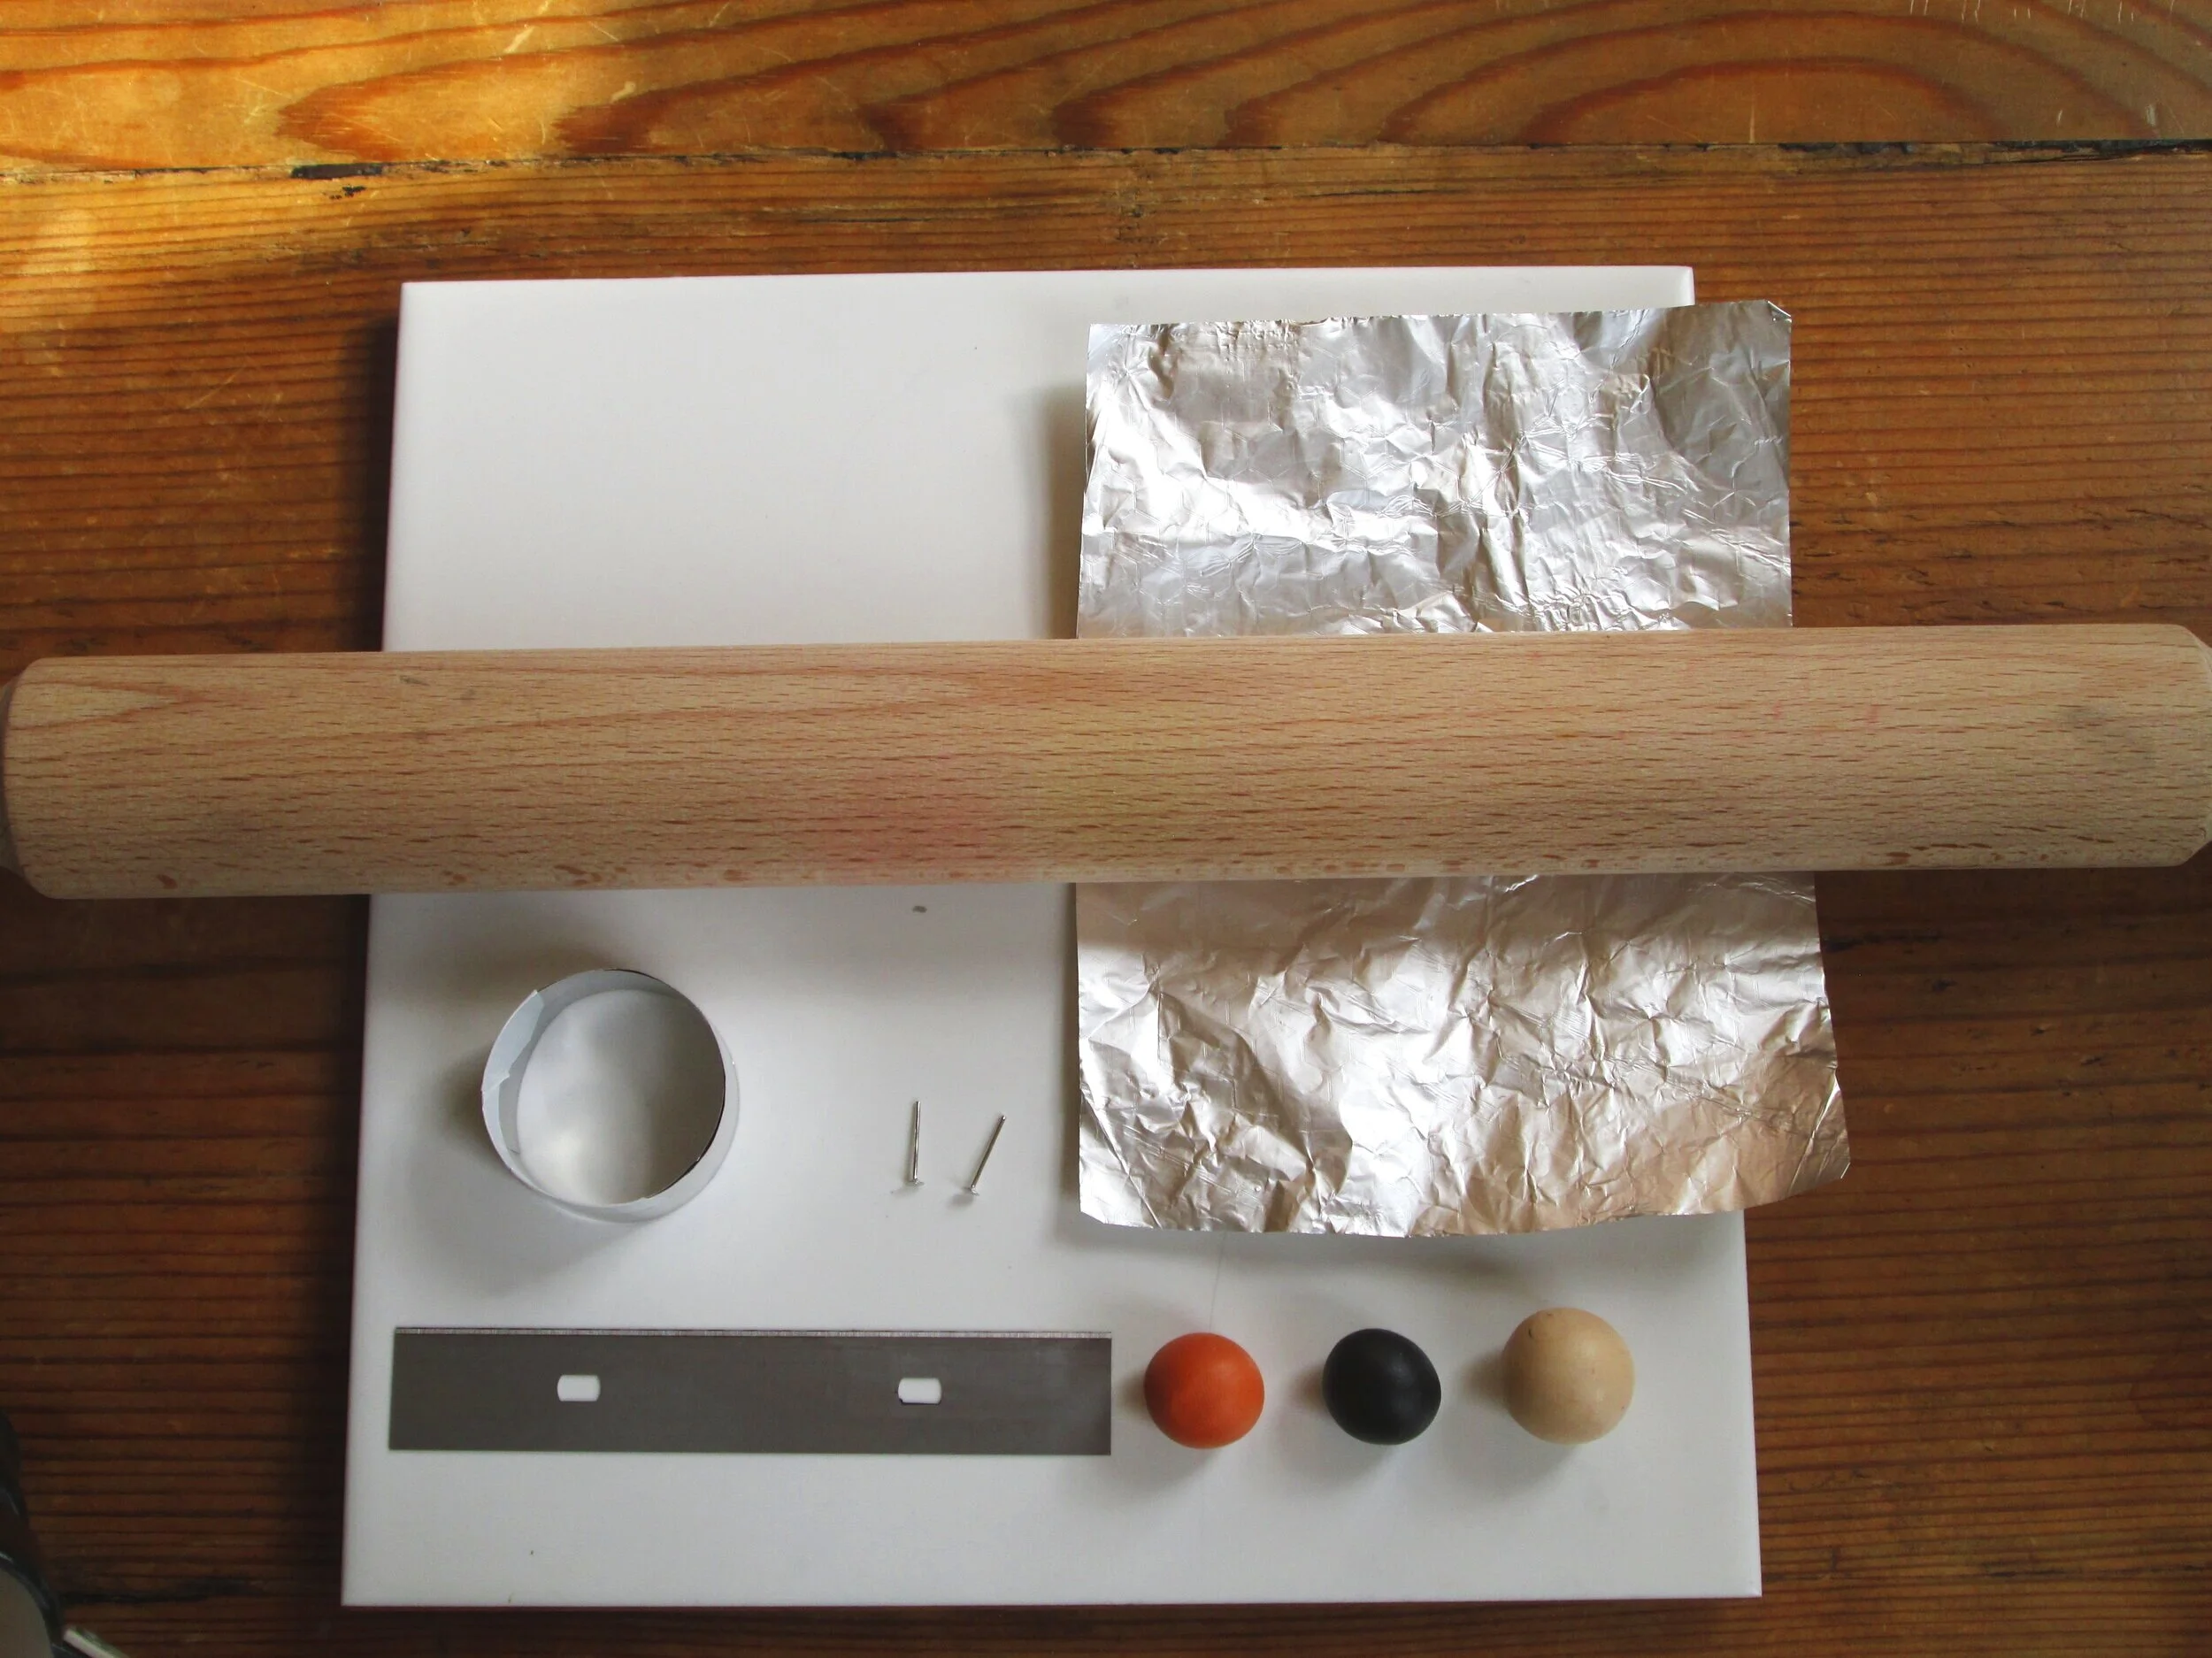
Tools
Fimo in three colours - I bought this set, but you can also buy individual colours like these
Earring backs - these, or these if you need silver
Blade - a normal craft knife will work or I used these
Rolling pin - I used a normal wooden one but this one would be better if you fancy splashing out
Tile/piece of glass/flat plate - if you don’t have anything suitable you could use this
Something round to use as a template - I made mine from an aluminium can so I could get it exactly the size I wanted it. But you could use a coin/lid/etc
A piece of foil for baking
Baking tray
Oven preheated to 110°C

It’s not so easy to explain the method step by step for these earrings, so I’ve tried putting a video together…this is my first attempt at making a video so please don’t set your expectations too high!!? I hope it explains the main steps in enough detail but if not, I’ve added a bit of supplementary info below. If I’ve missed something, you can always ask in the comments below.


Choosing your colours
Fimo comes in loads of colours including primaries so mixing your own from scratch is an option. I chose a multipack I liked the look of (this one) so I could have a go with a few colours. If you know exactly what you want though, I would buy the bigger, individual packets like these.
The colours are flat and plastic looking so you won’t get a nice natural looking leopard print. Bare that in mind when choosing. You can get translucent Fimo ‘effect’ though…could be interesting? There are also glitter options if that’s your bag.
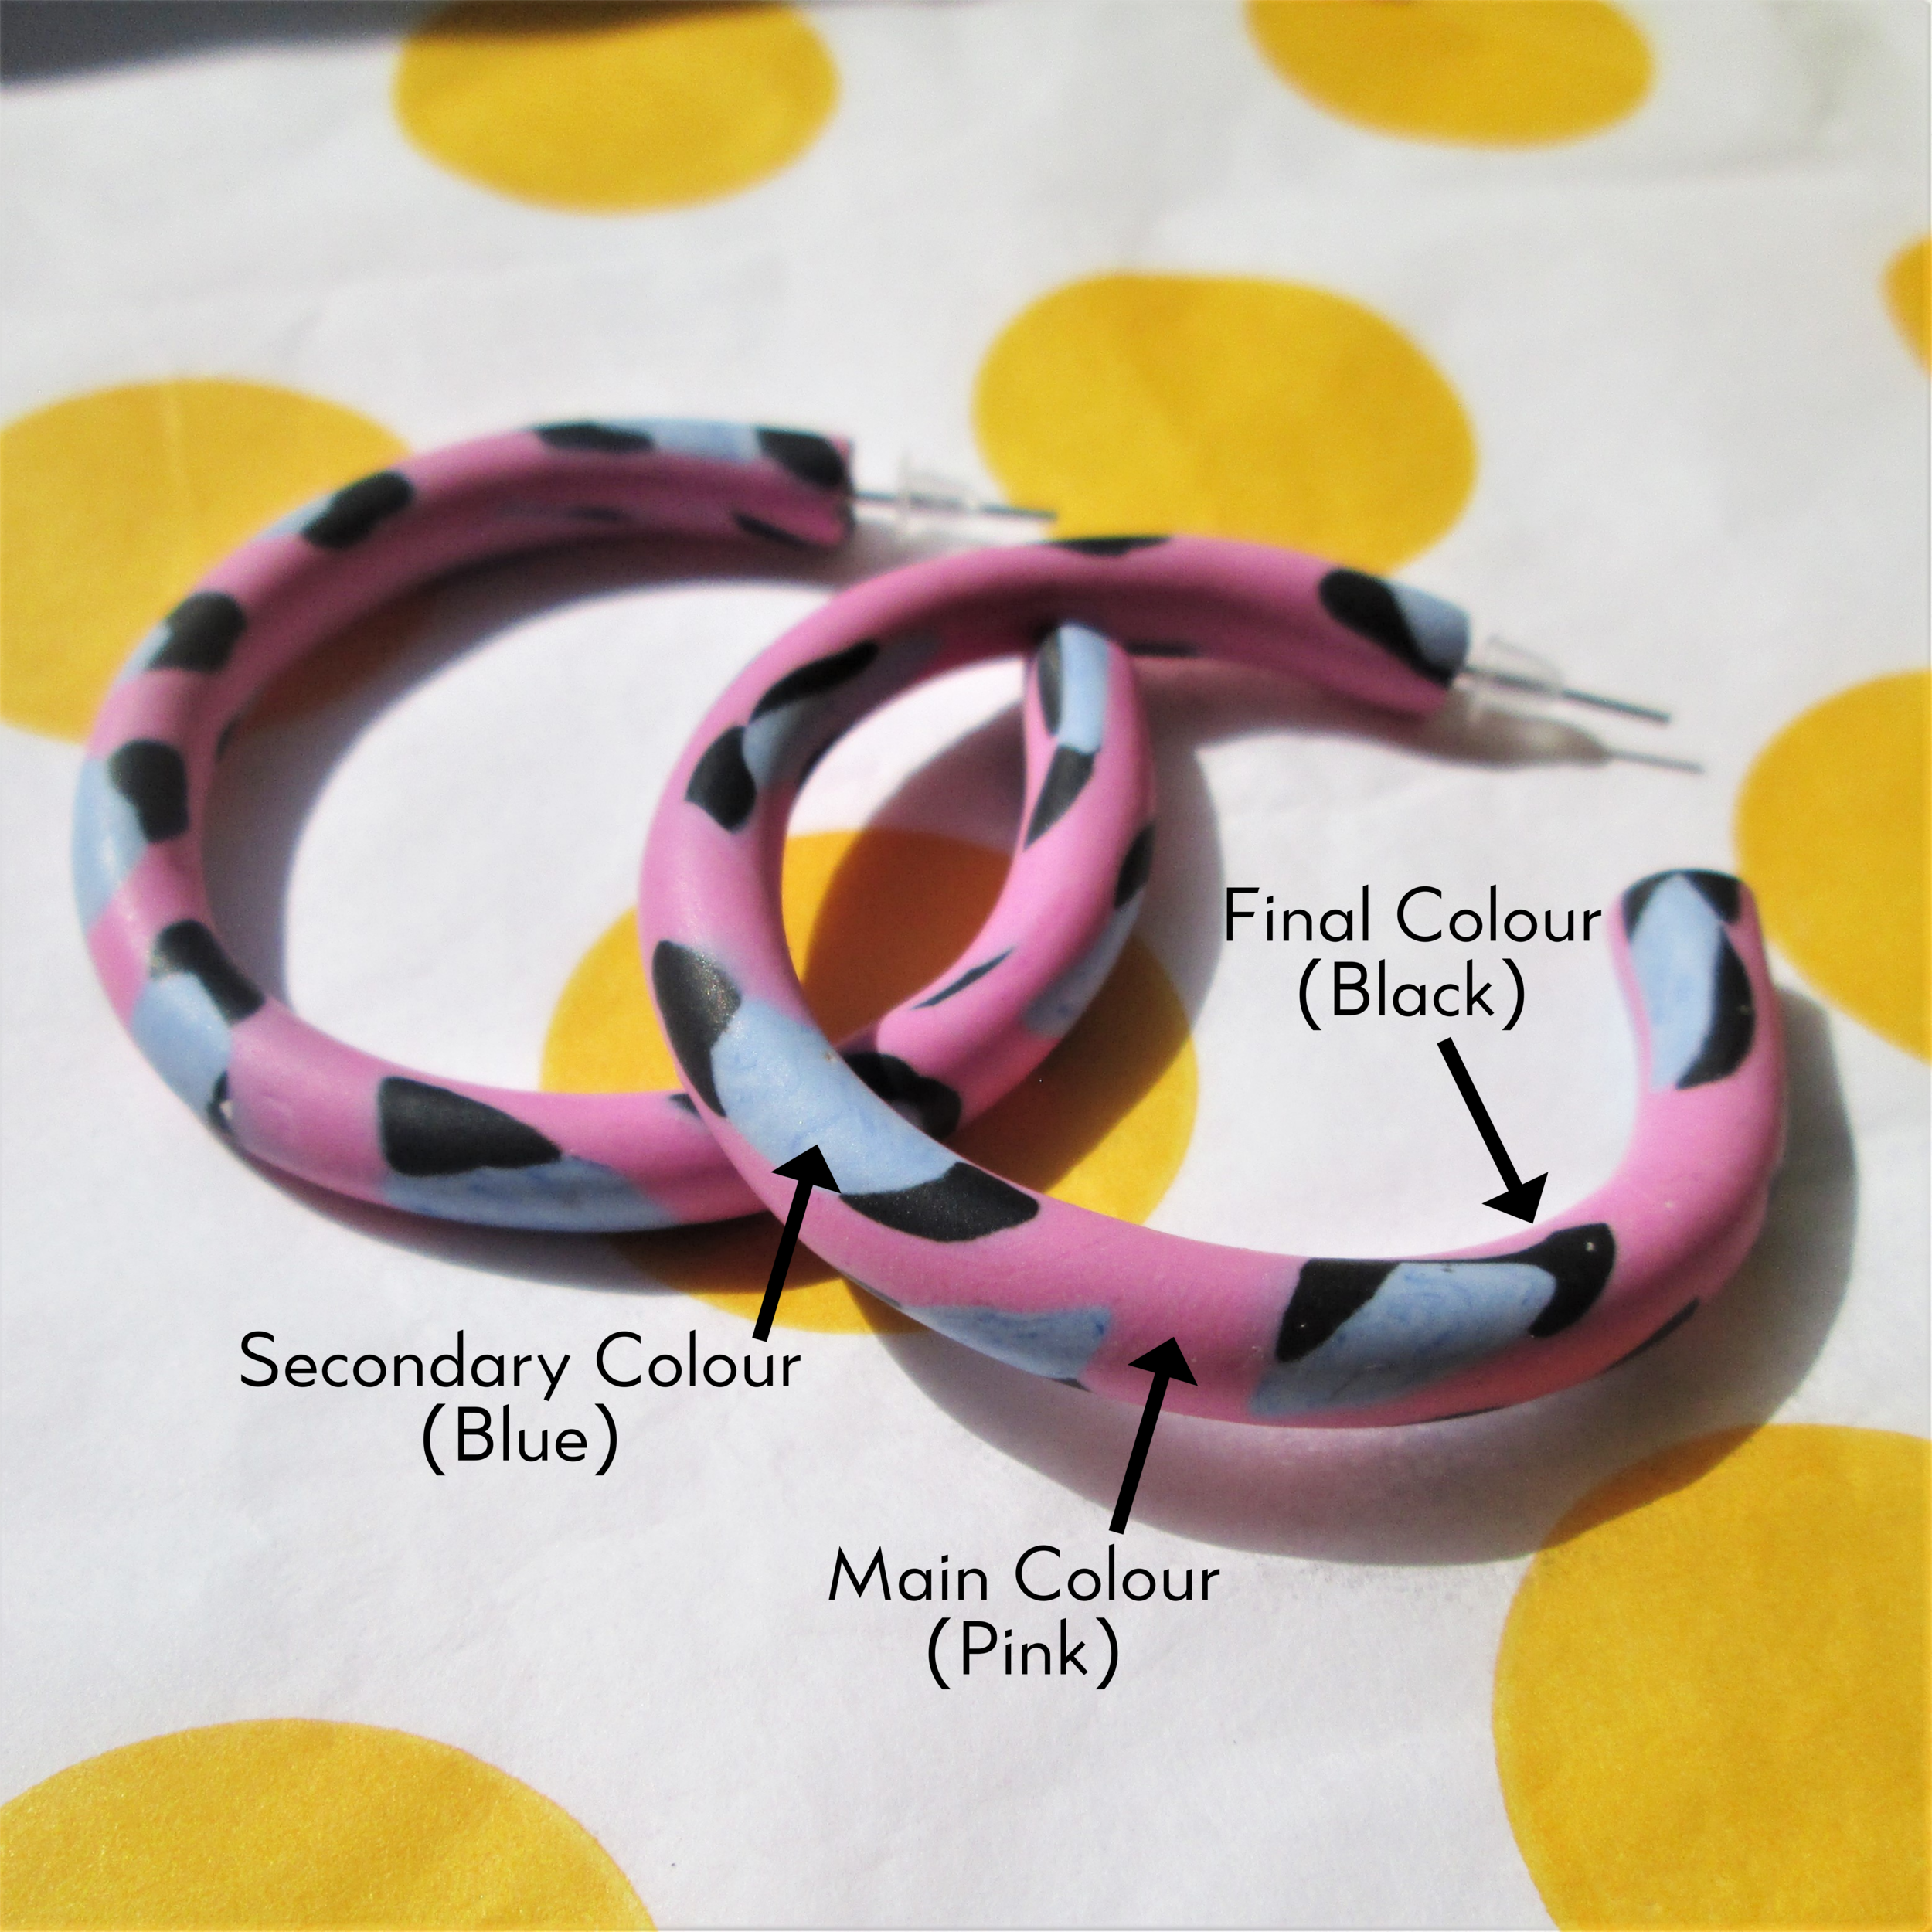
For the pink and blue hoops I made, I mixed a bit of white with the blue and pink to make them more pastel. Have a play around until you get the colours you want.
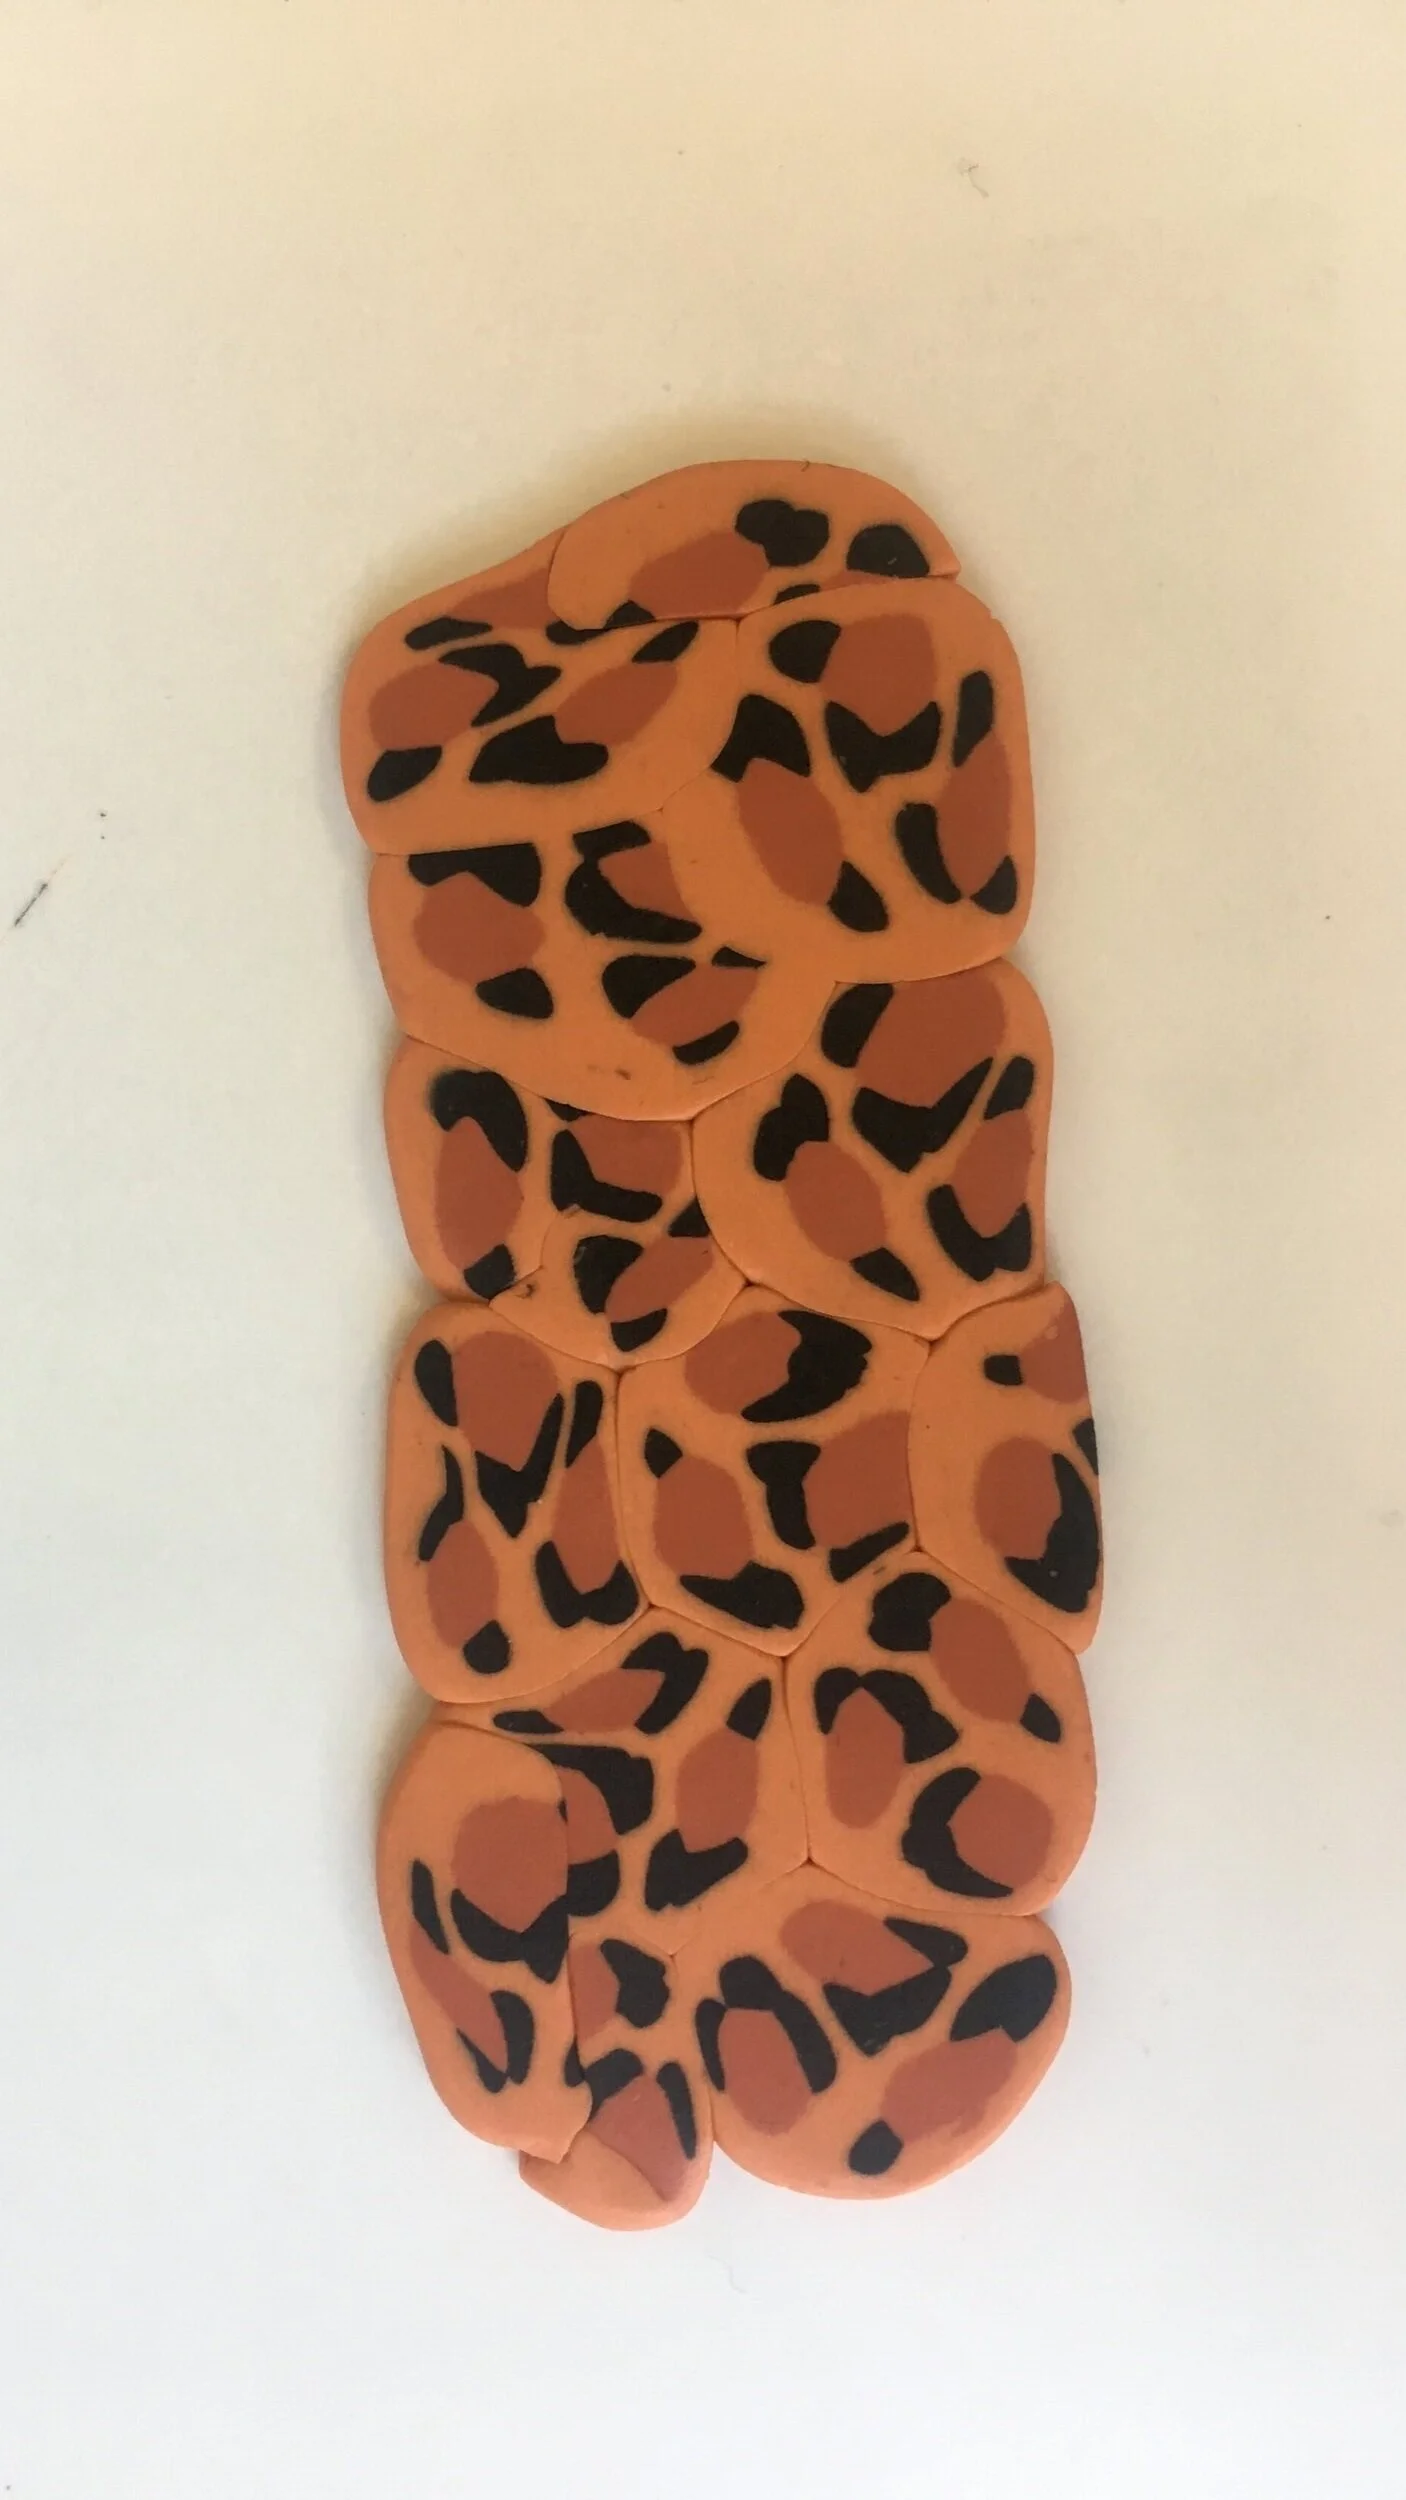
Spot size
You can adjust the leopard print size by rolling your Fimo thinner or thicker. This can be done at either of the stages below.
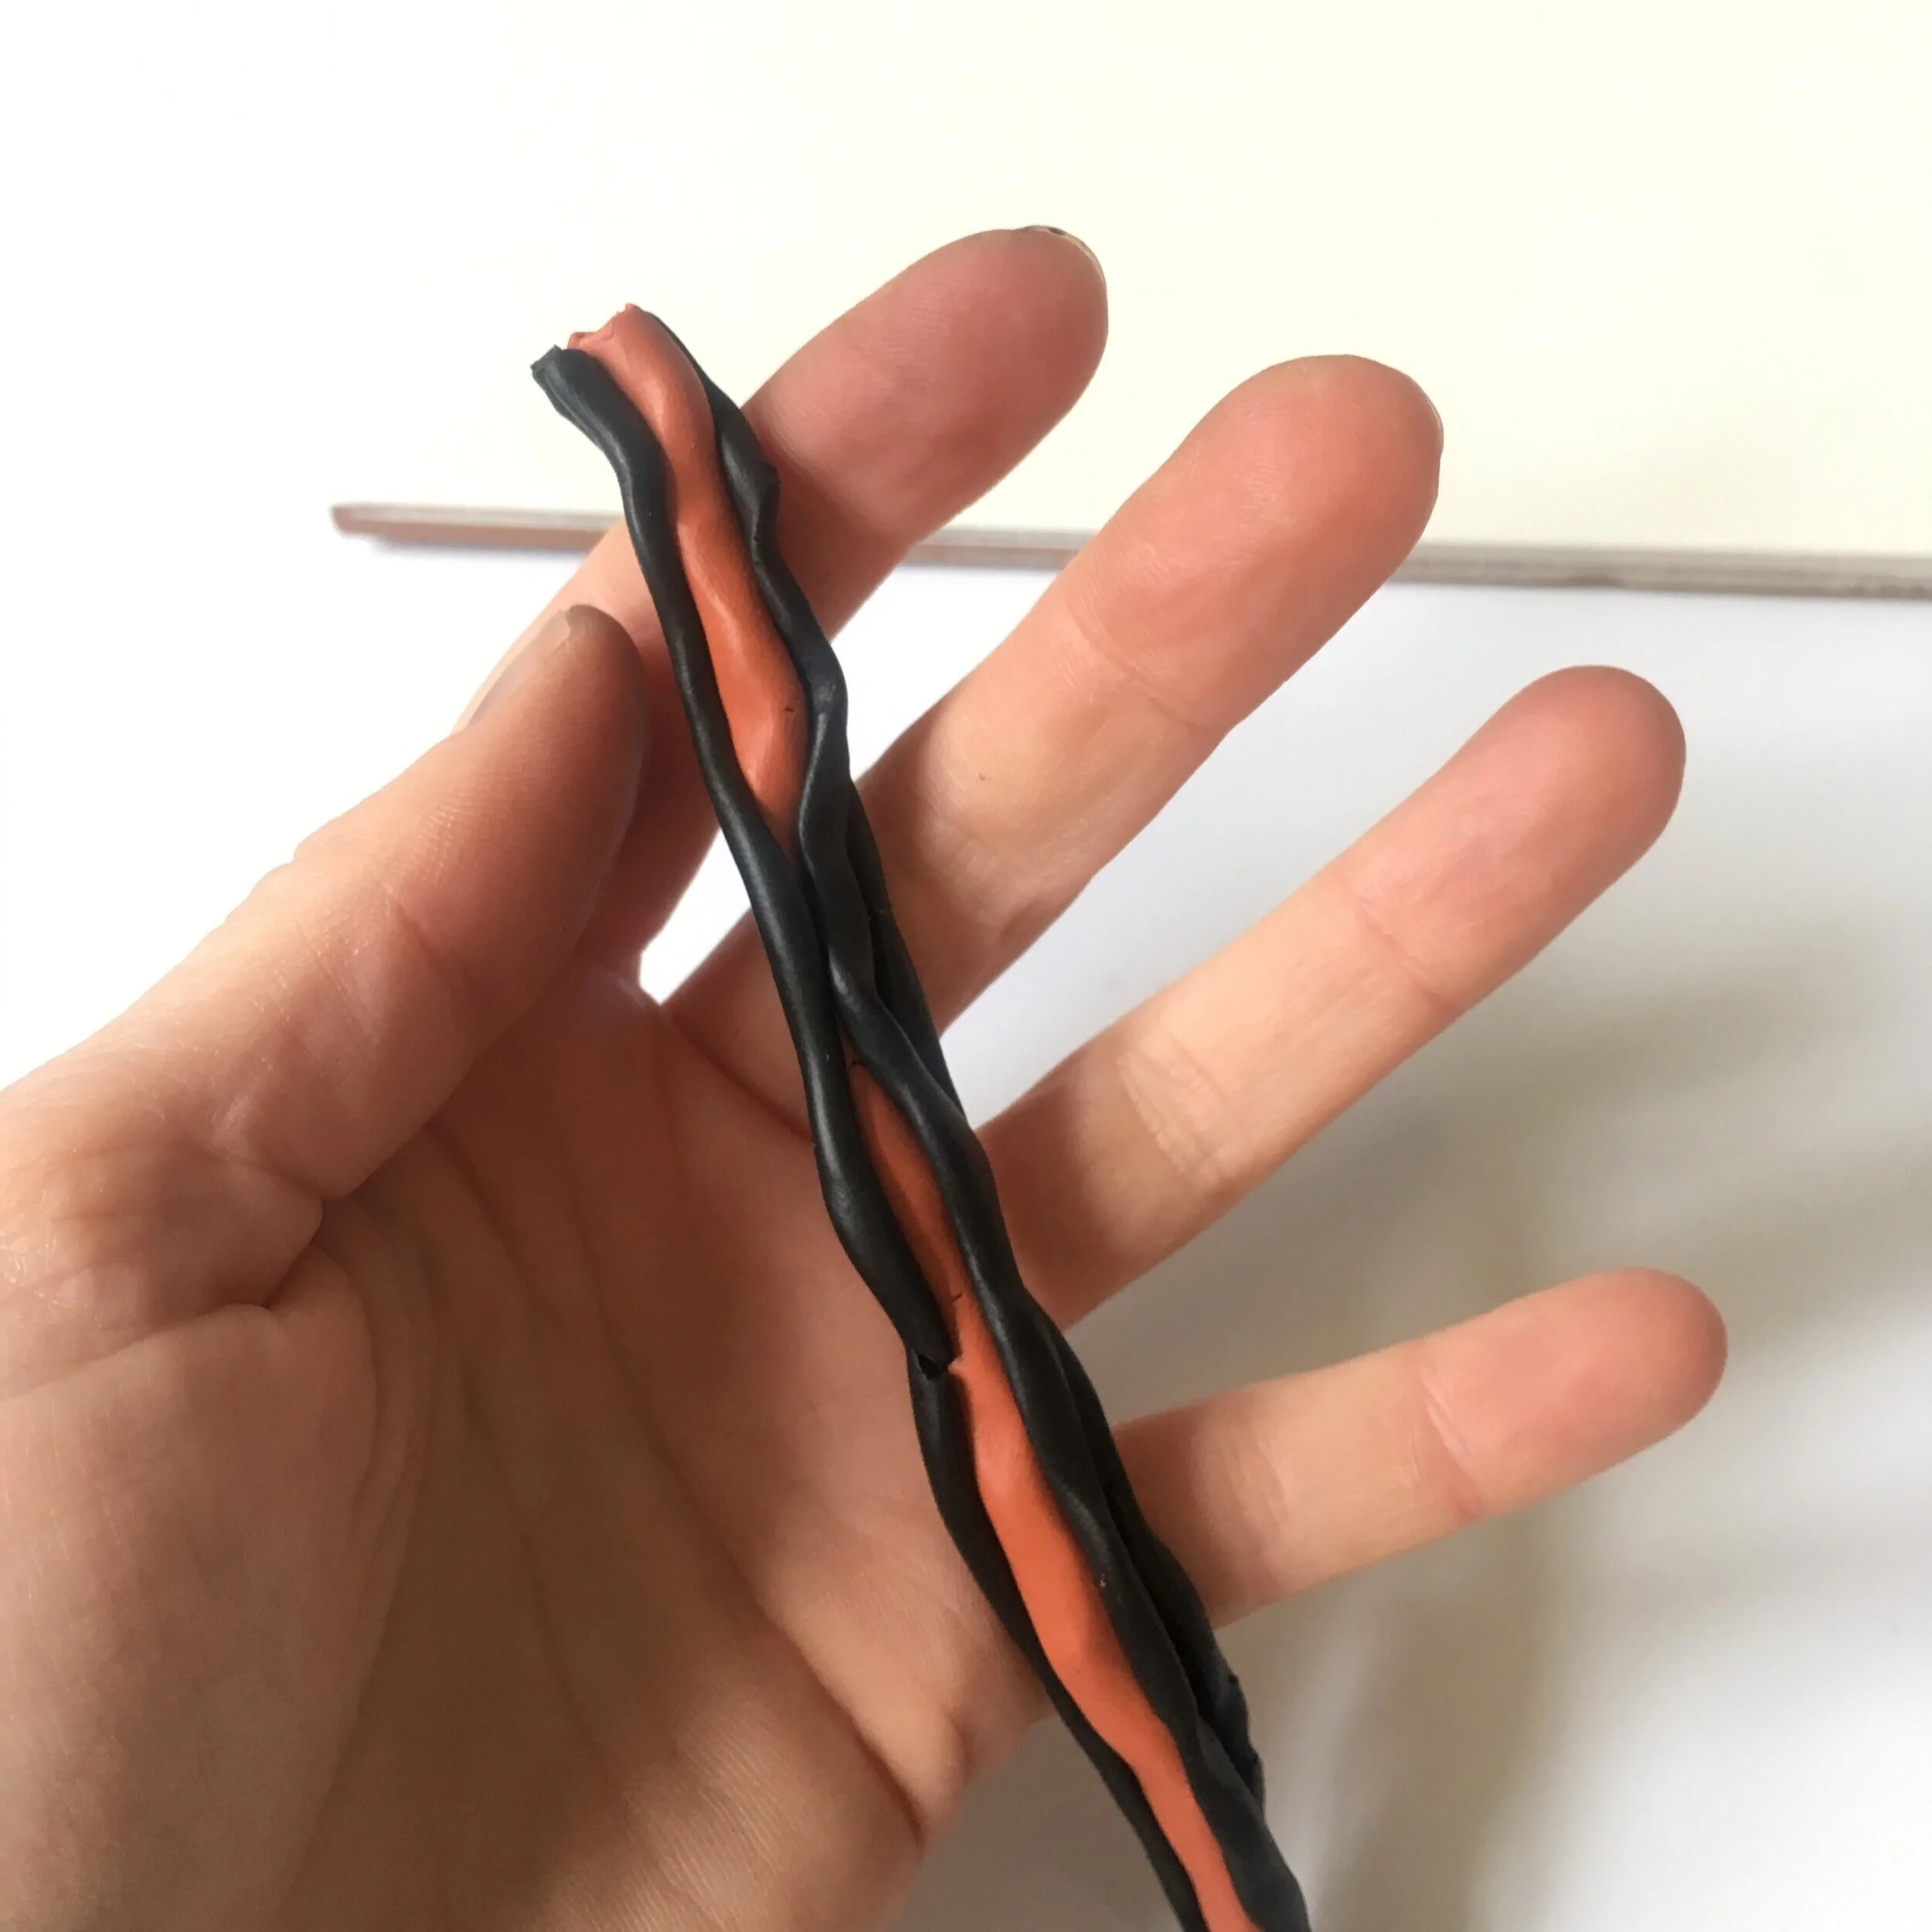
Roll your lengths to the thickness you want before you attach them together. The thinner the lengths, the smaller the spots. It’s better to do it at this stage than the next if poss.

Or you can keep rolling the ‘cane/stick of rock’ until the spots are the size you want. They may start to distort though so only do this if you missed your opportunity at the last stage.

Smaller spots!
Bigger spots!
Hoop thickness
You can roll your hoops as thin as you want them, but the spots will distort if you roll too much. To avoid this, when you put all your slices together (see pic), make the rectangle a bit narrower so you don’t need to roll it out too much.
You will have a ‘seam’ where your hoop is rolled up, try and keep this on the inside of your earrings when you’re shaping them around your template. This way you’re less likely to see it when you’re wearing them.
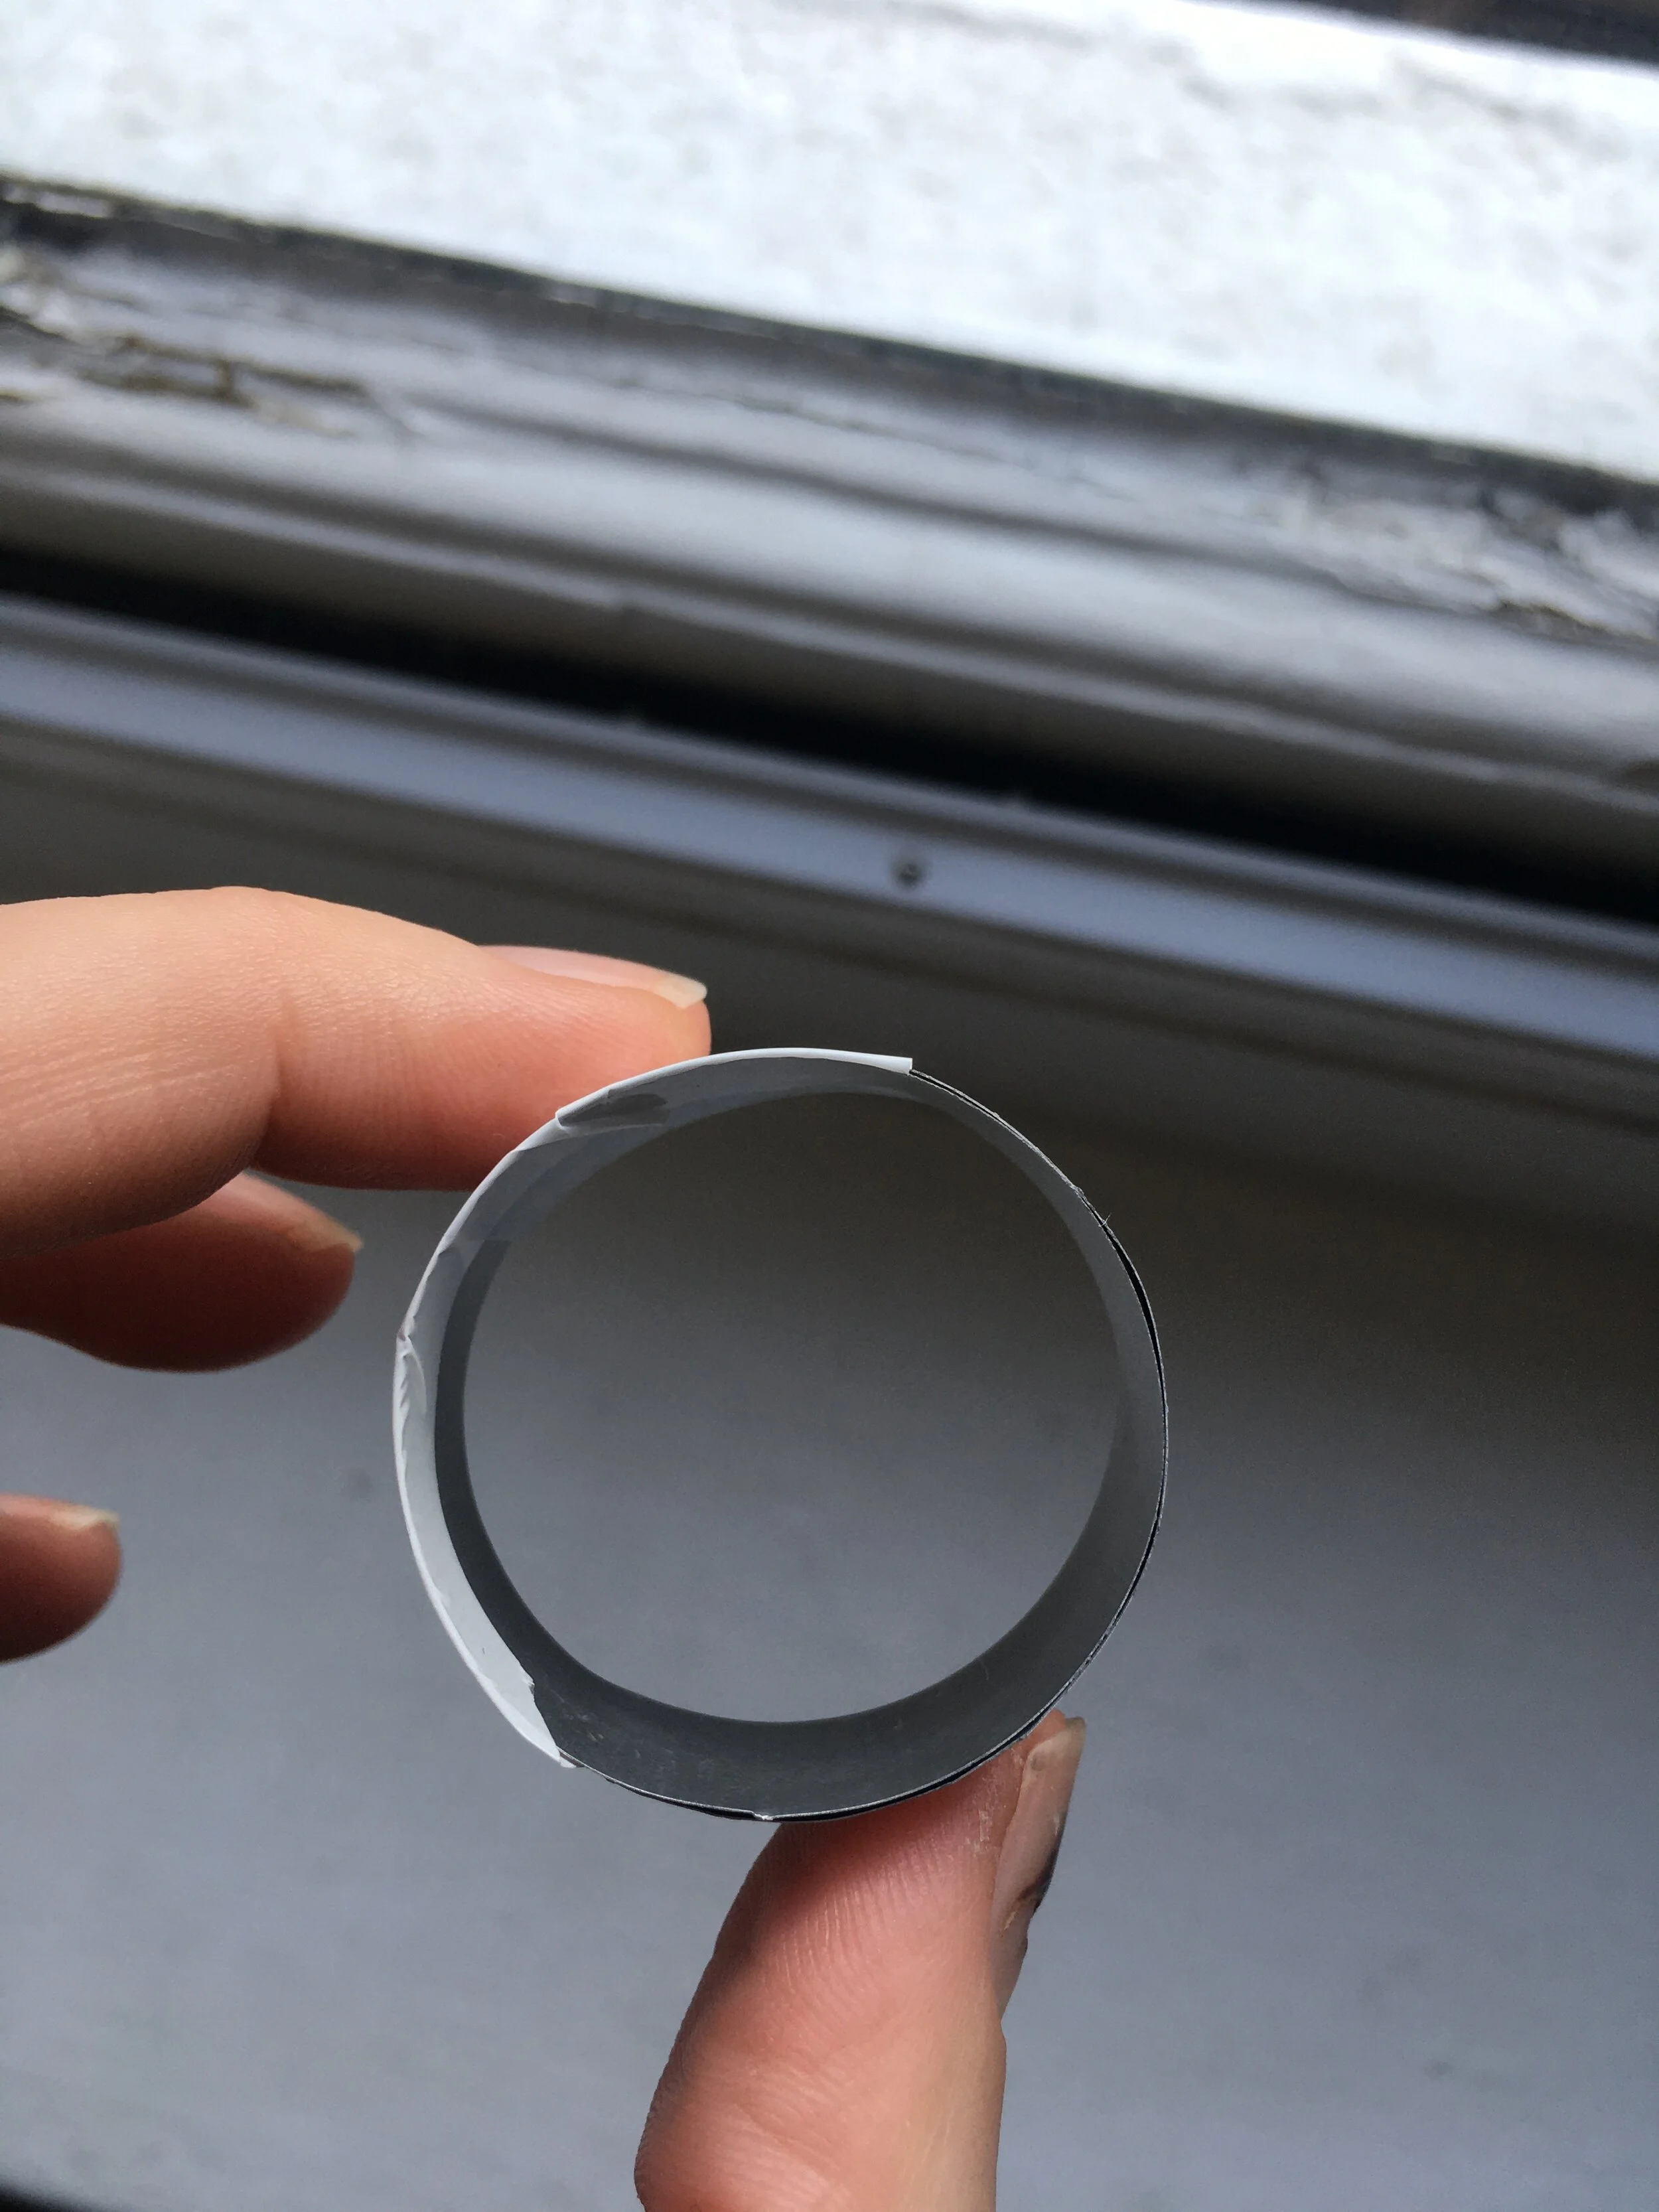
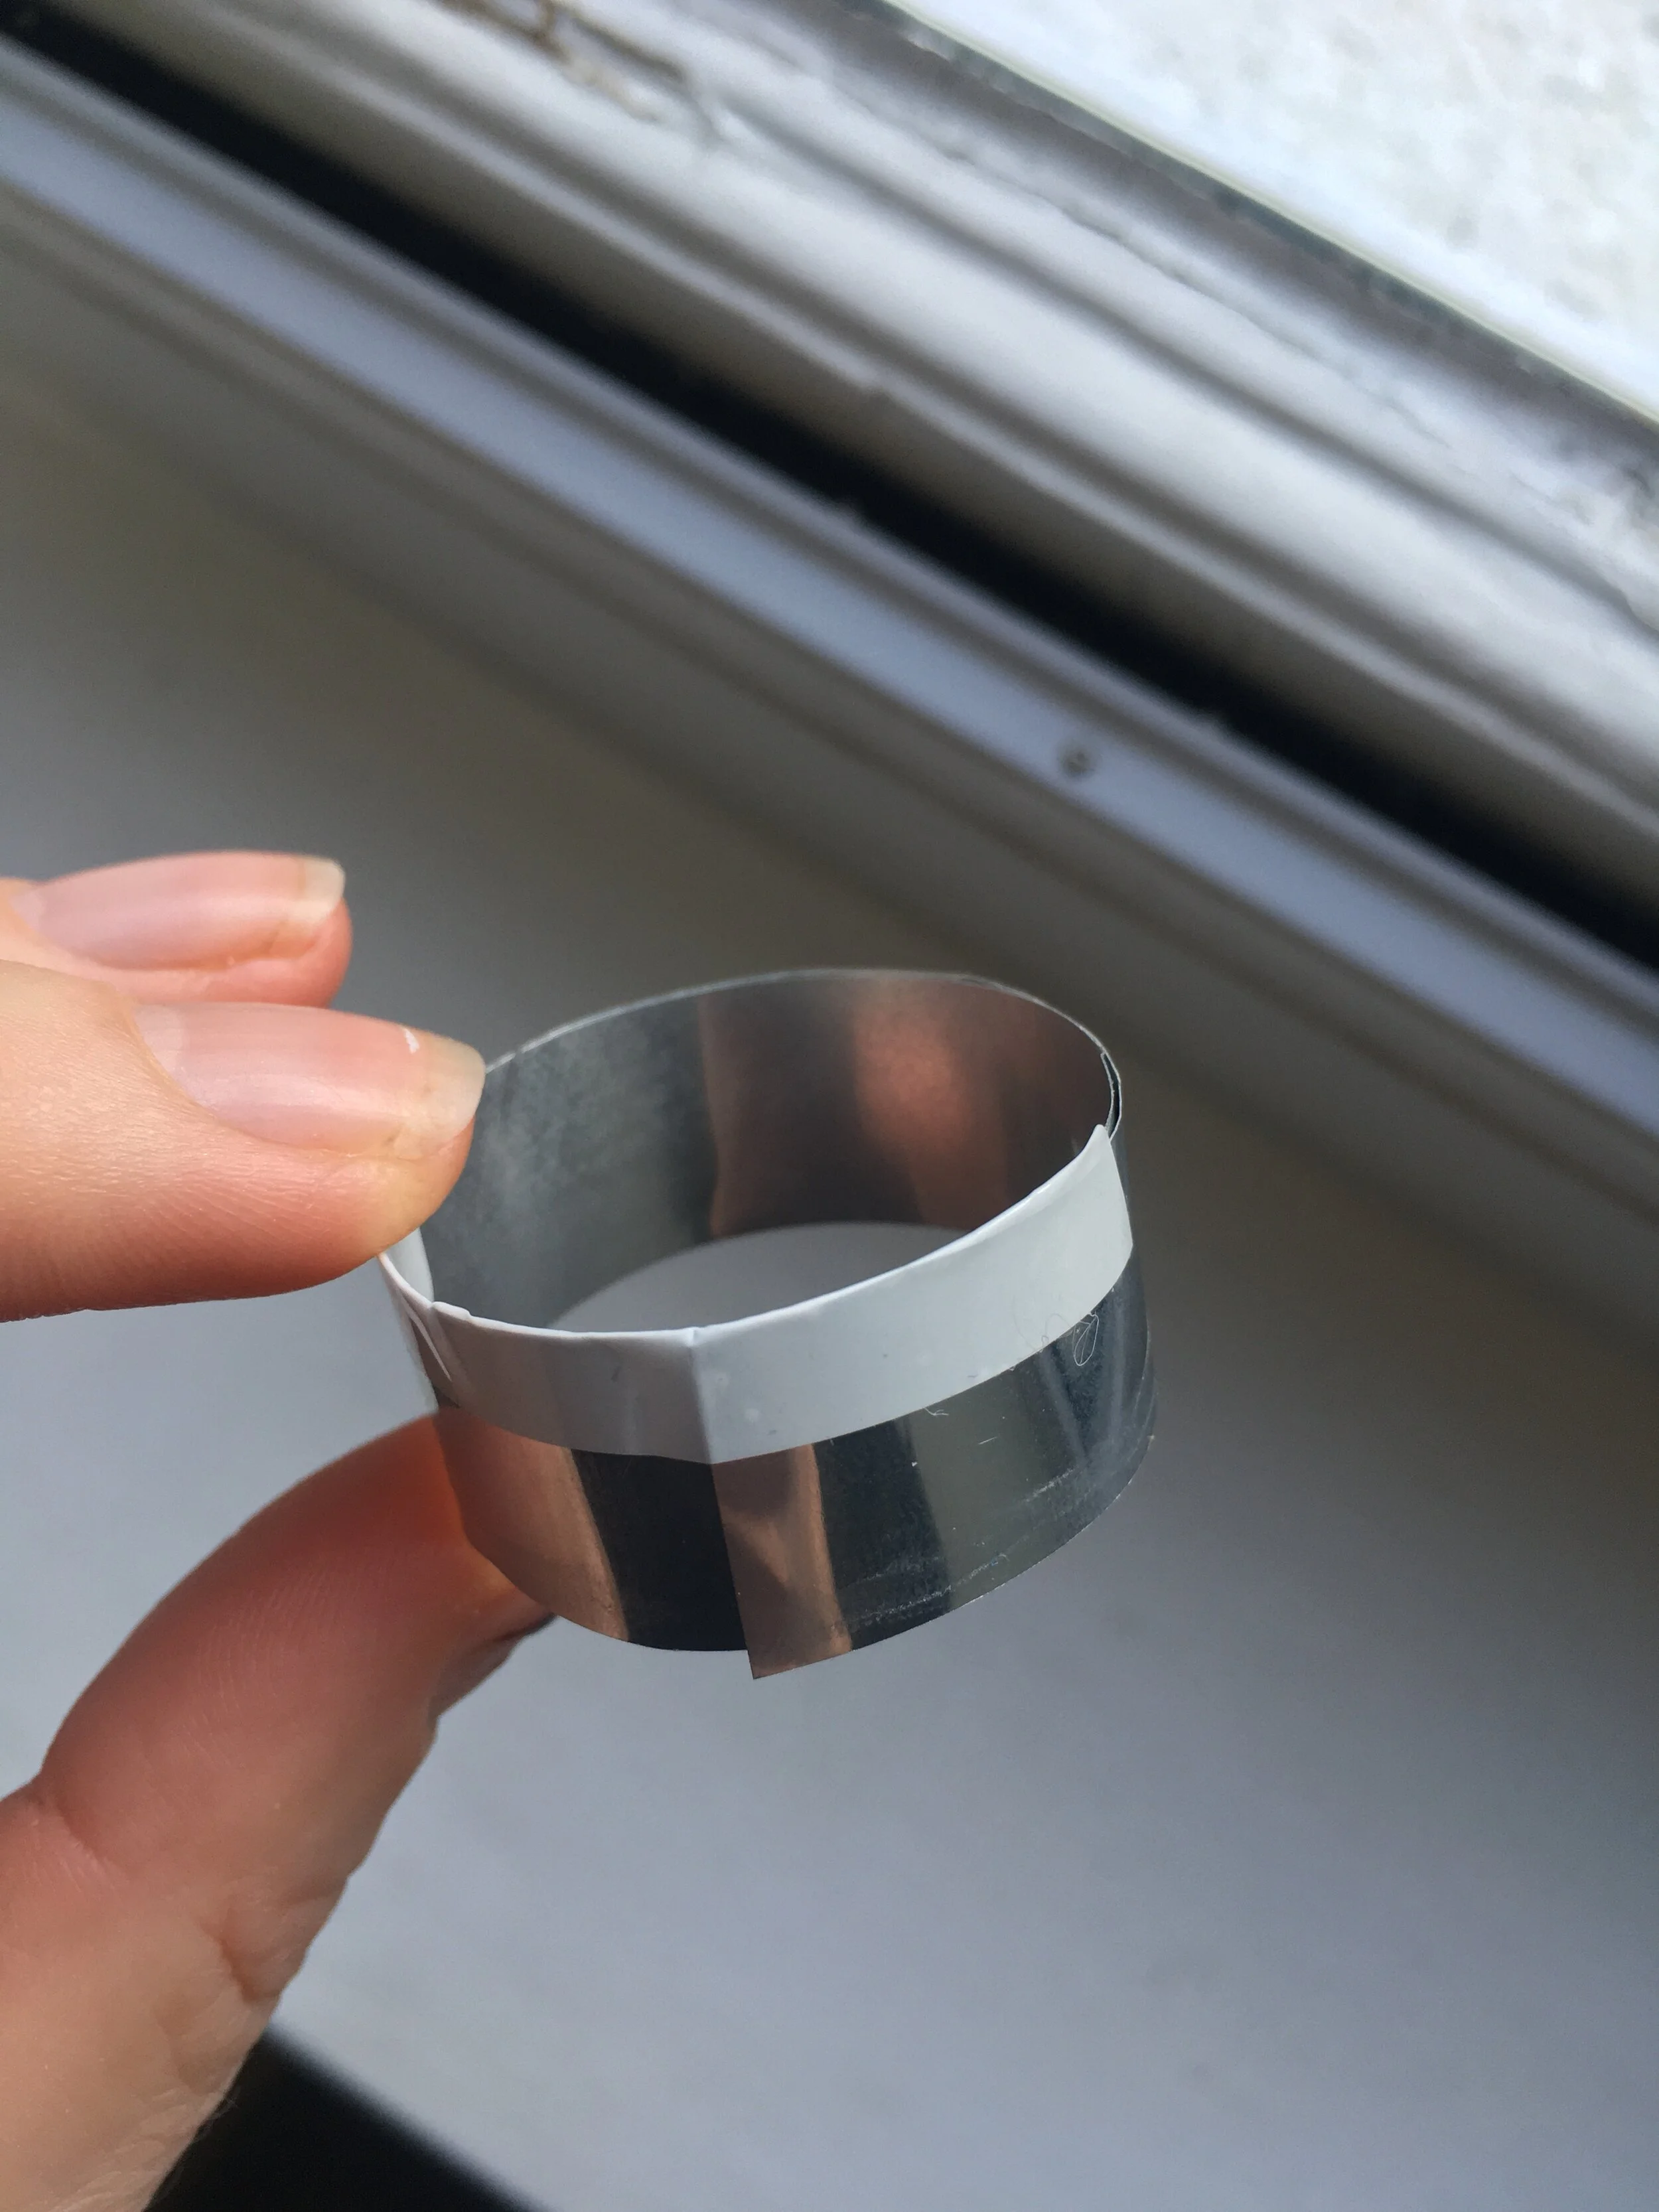
Choosing a template
I tried a couple of things I found around the house as my template but ended up cutting up an aluminium can and taping it to get the size I wanted. The template will form the inner circumference of your hoops so you’ll need to have a play around with a few objects so you can get the size you’re after. You could try a shot glass, small jars, coins, hairspray bottles (check the bathroom, there’s loads of round bottles in there!).
If you want to try using a can, you’ll need a pair of scissors you aren’t too precious about and some sellotape. Slice the can open and cut out a strip from the middle, following the circular shape of the can. Be really careful because the aluminium is super sharp. Mould the strip into a cookie cutter shape and sellotape in place. It will retain it’s shape better if you can double up the strip, but don’t worry too much about that, just try and get it as round as possible.
Your earrings will still be a bit soft when you get them out of the oven so let them cool fully before you pick them up. If they’re still a bit soft you may need to bake them for a few more minutes. Check the packet instructions as well, as different brands and types may have different baking instructions.
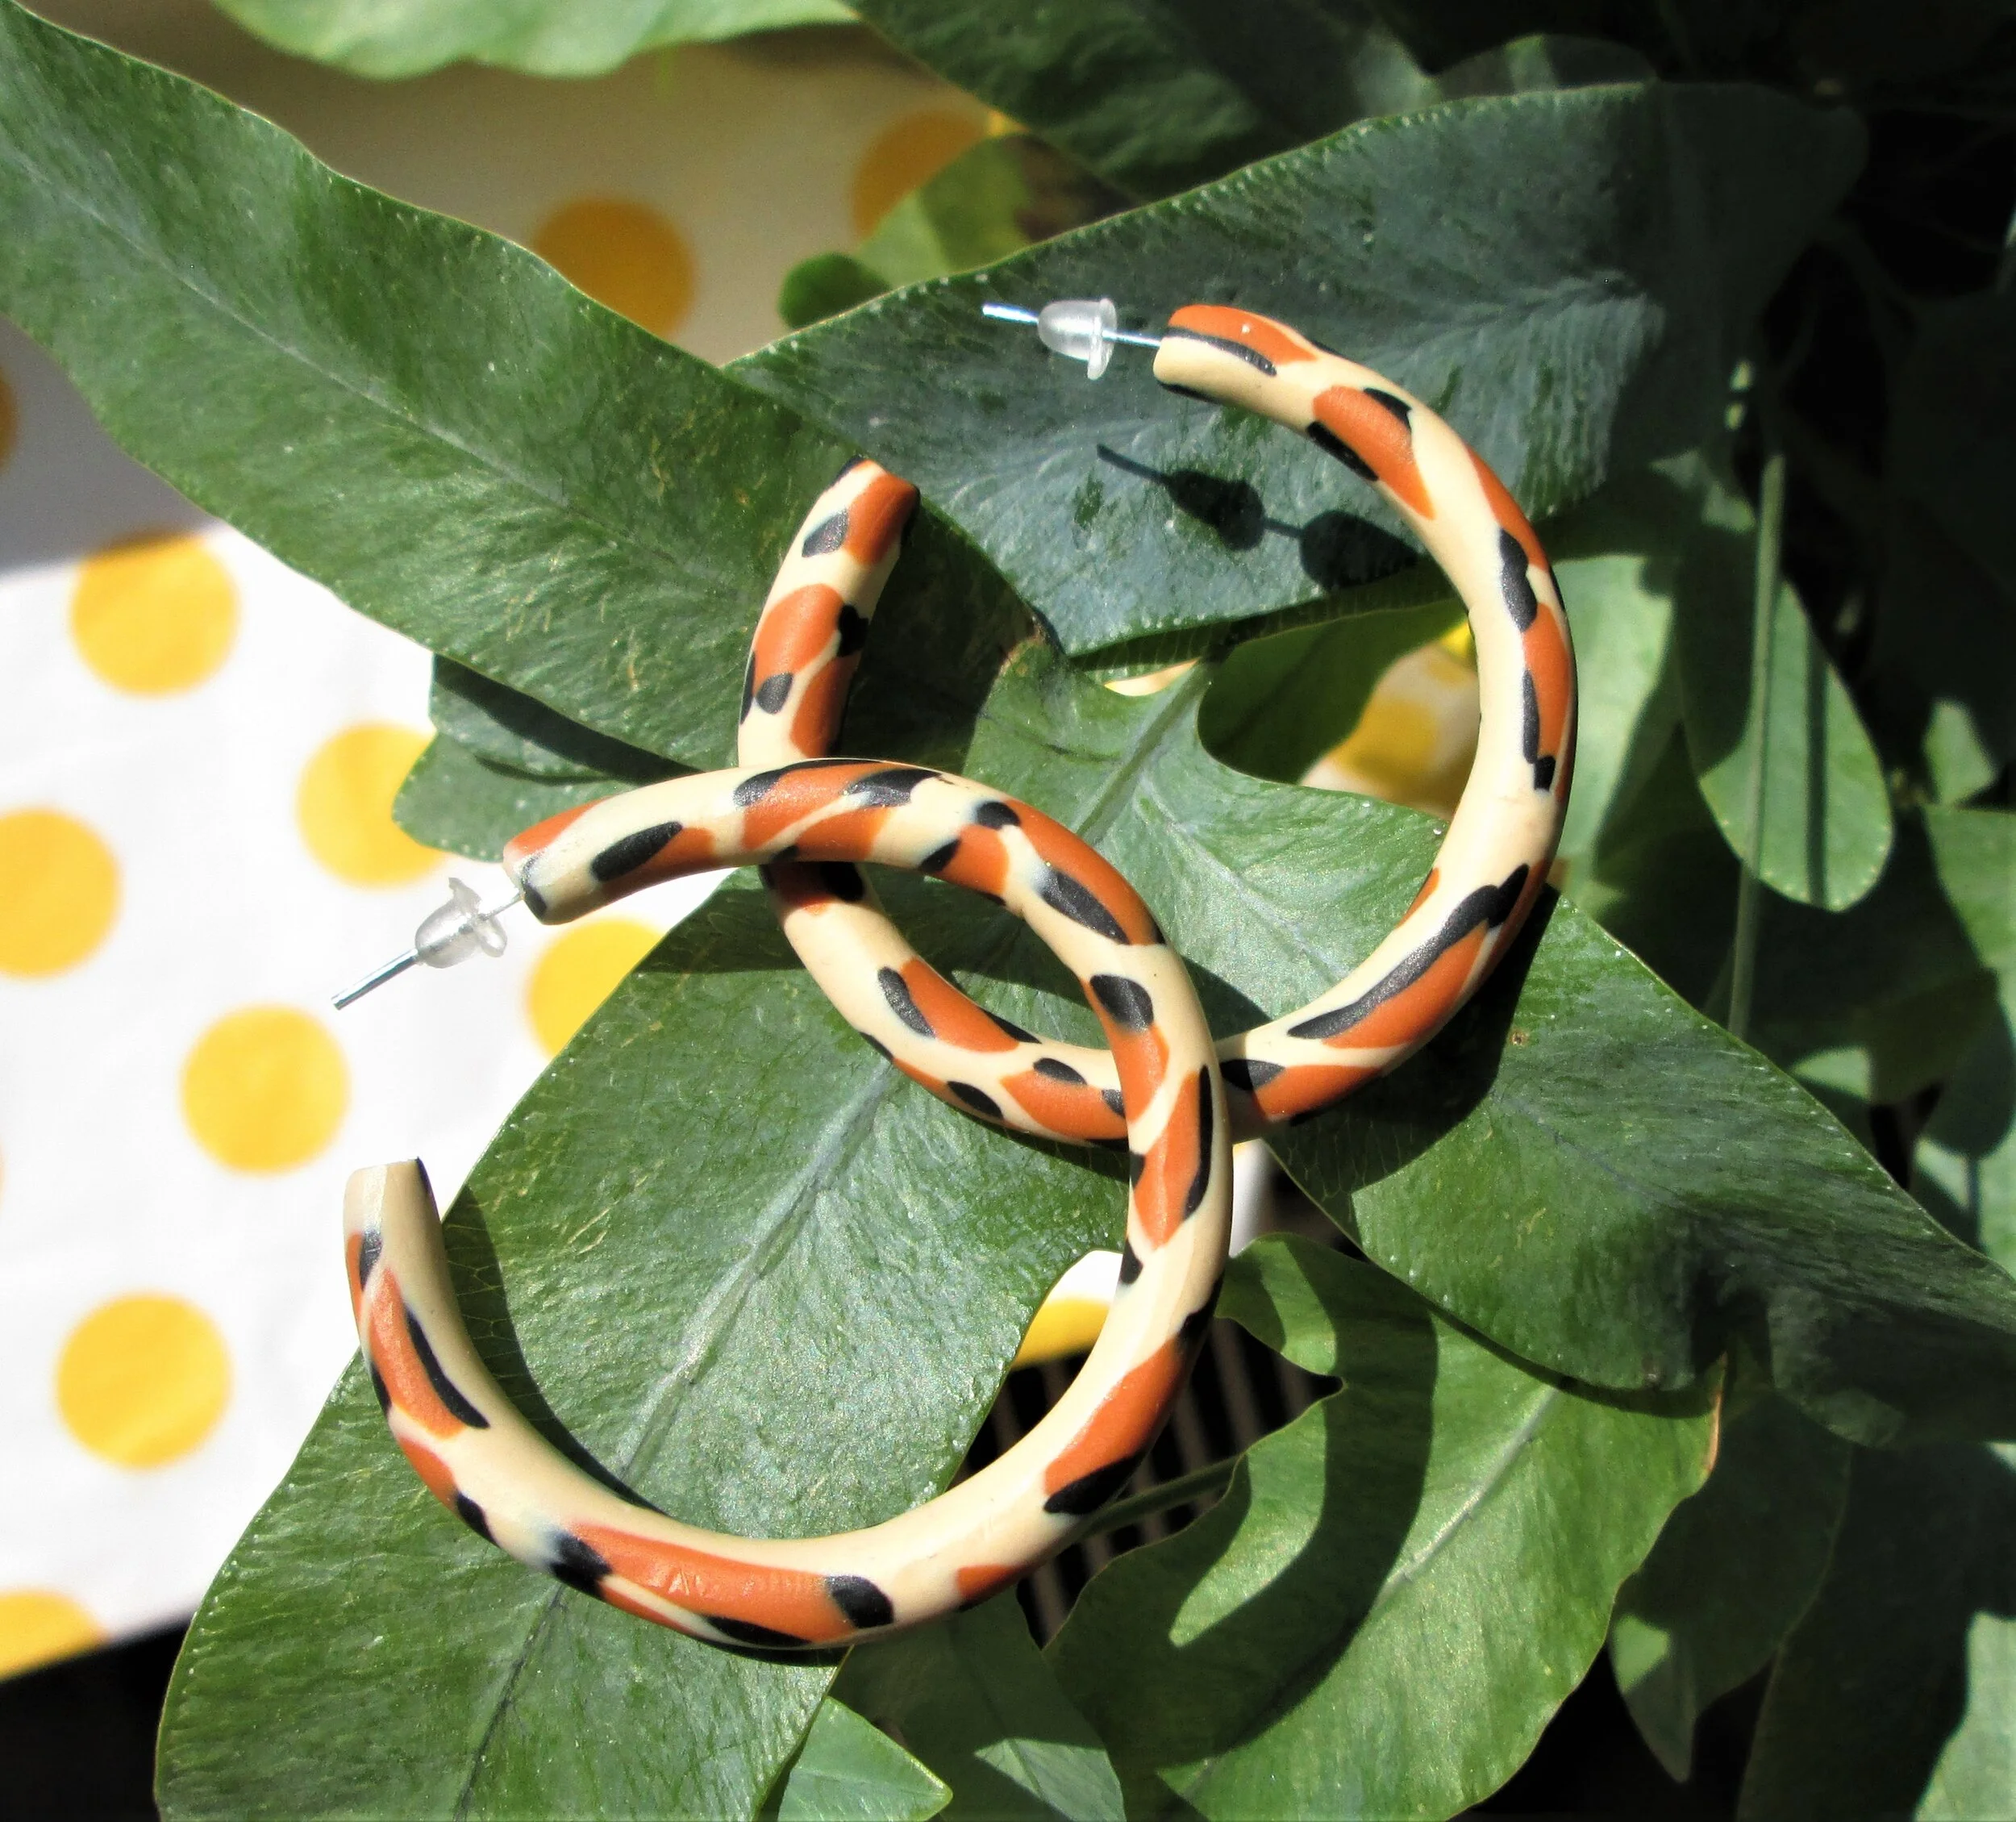
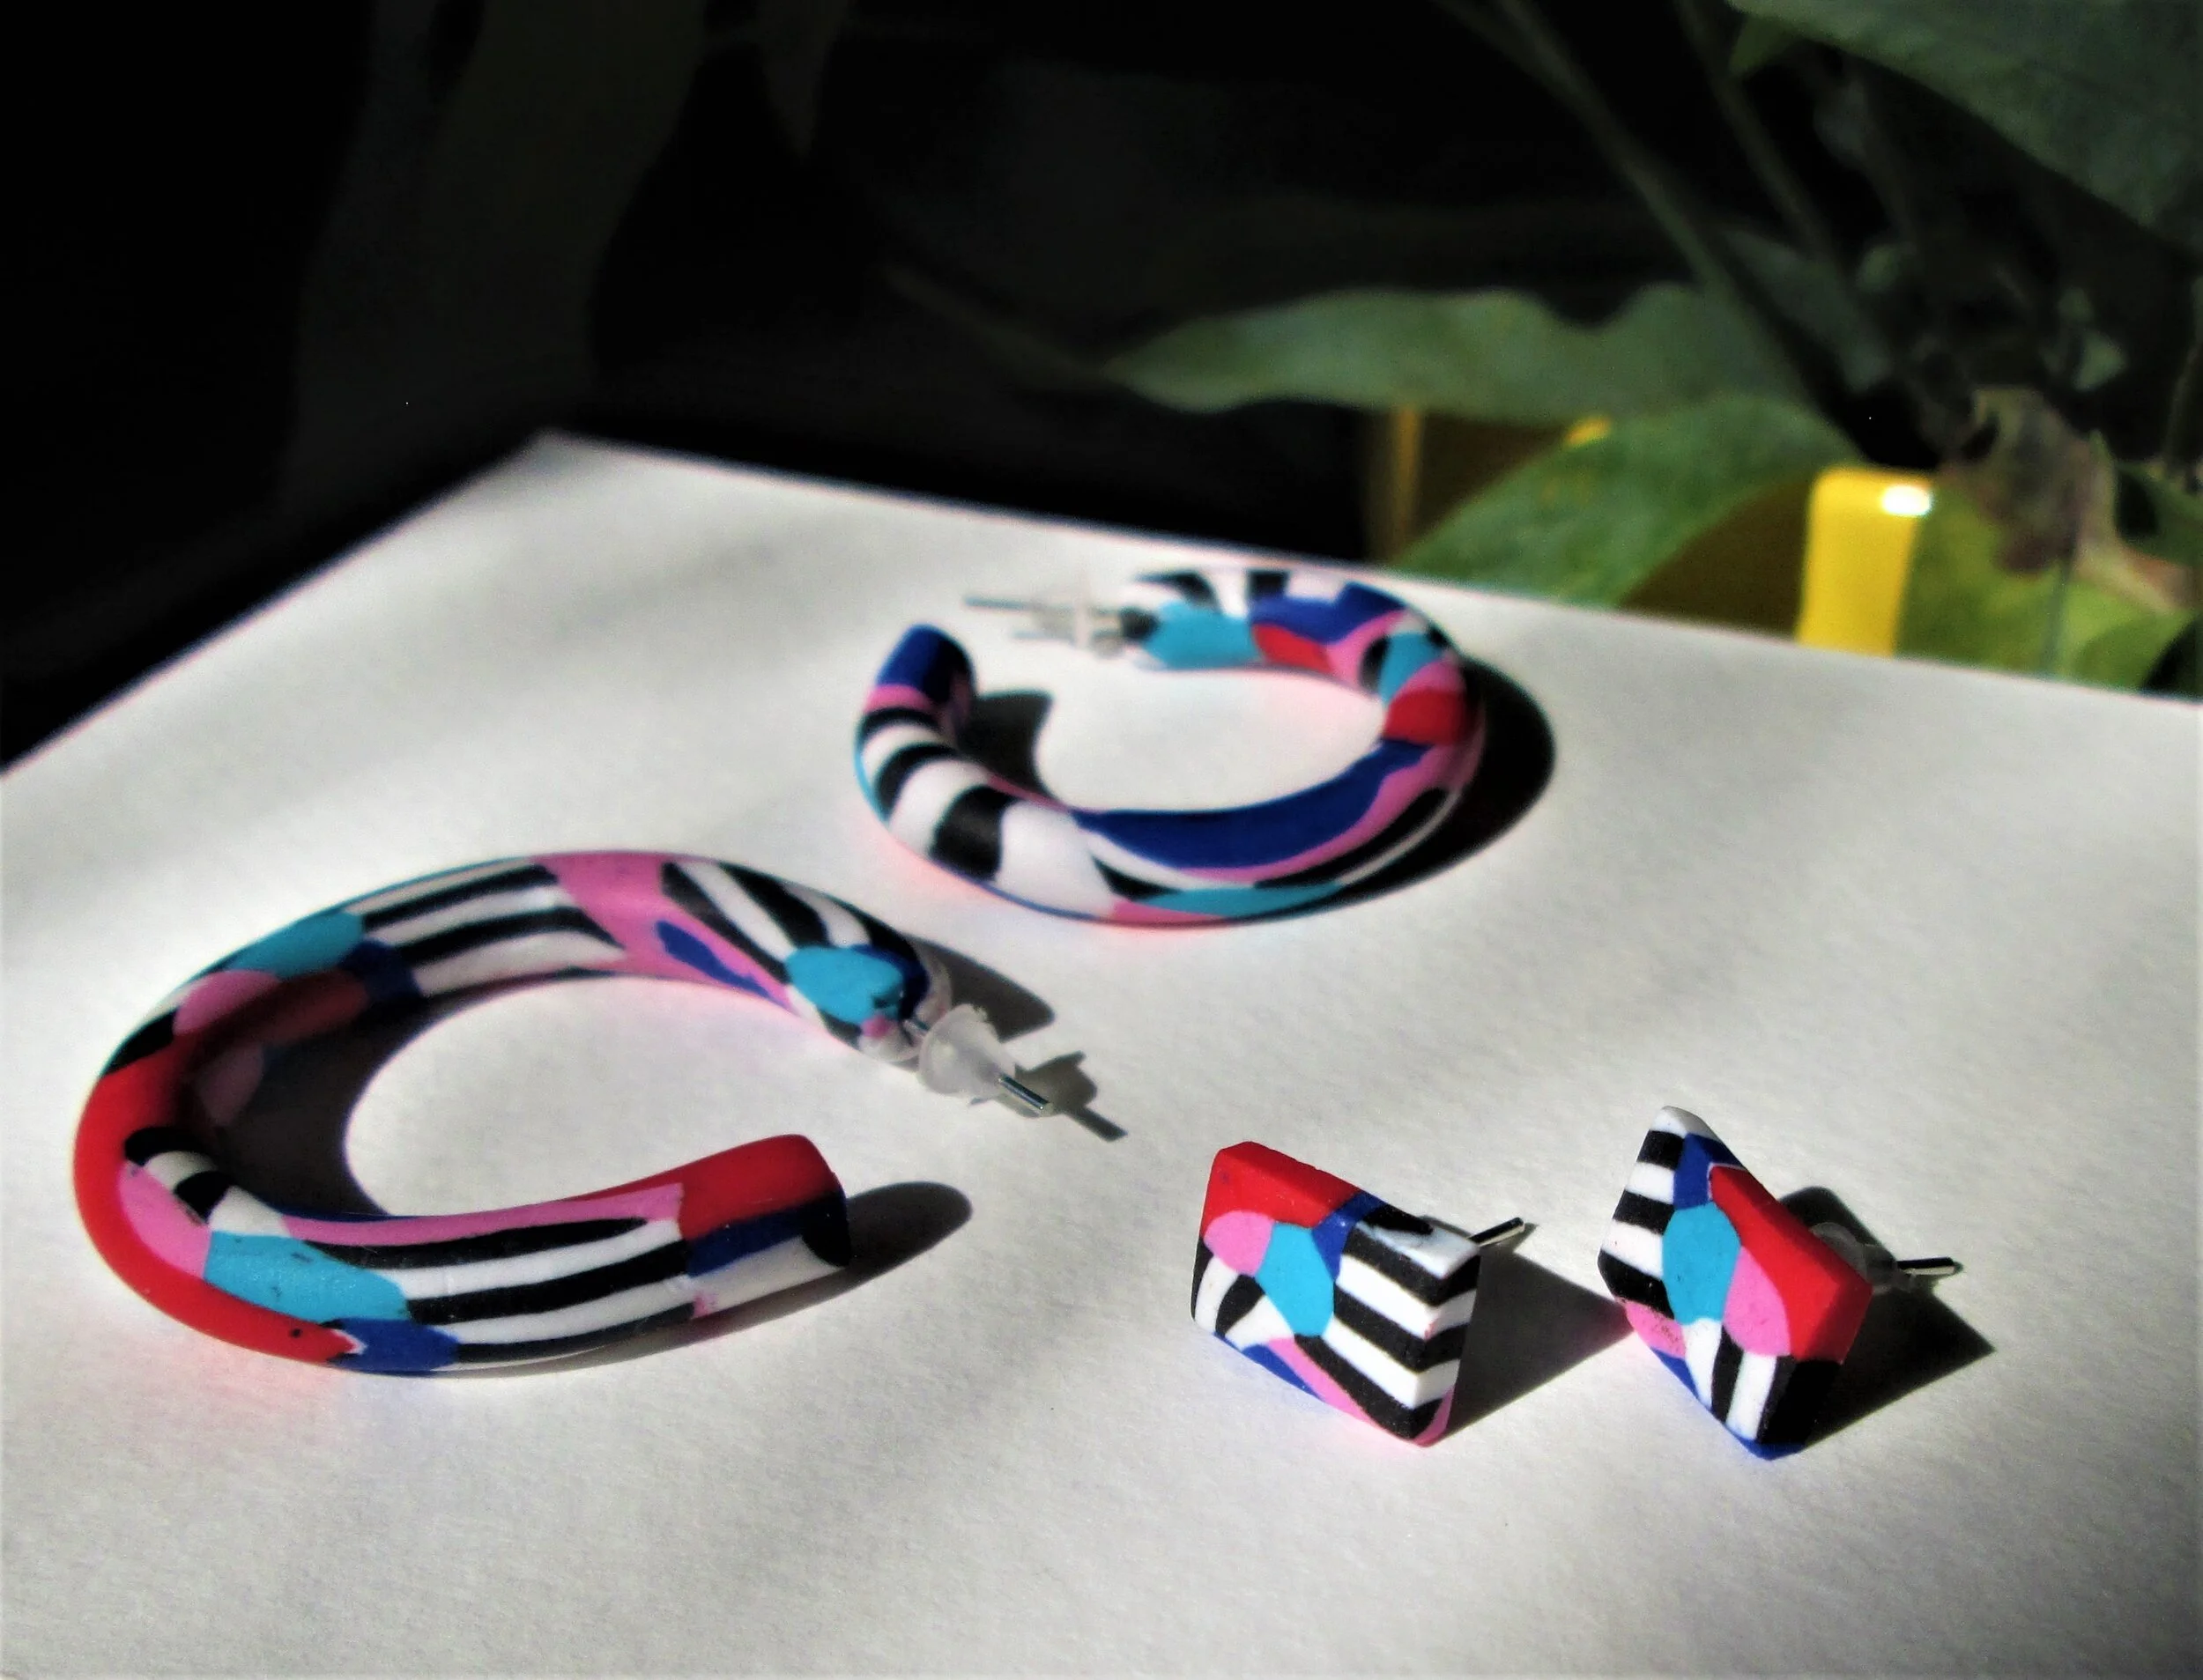
Once I’d figured out how to make this method work, I had a little experiment with a different design. The earrings below were made in a similar way but with different colours. I also cut a couple of the slices down into rectangles to make little studs. Super satisfying!

If you have a go at making these, send me some pics and feedback. It’s easy to forget vital little bits of info when you’re putting tutorials together and I can always add things after publishing. I think this might work as a short workshop too, maybe a good one for hens looking for an alternative hen-do activity? If you have any thoughts on this, send them over!