

Make Colourful Clay Tiles
This was just a little experiment with some air drying clay I had. But I found the painting bit so relaxing I thought it was worth sharing
Another apology to start this weeks post…I fully intended to write about wax ring carving but I’m so hopeless at it that I don’t really know what to say. Fingers crossed I will have made something worth sharing by next week. This project was just a little side experiment that has somehow made it onto the blog. So yeah, sorry about that. I’ve also been busy with some other work so the blog fell to the wayside a bit. I’ve finally made some progress on the rebrand and decided to outsource it. It feels like a real cop out because I’m one of those people who can get quite protective of their projects, but the name Studio ND was always meant to be temporary and I’ve been procrastinating on it for a looong time! Now instead of feeling guilty, I’m excited to see what the designer comes up with!
All my making has finally got to Charlie…he now has a couple of his own projects in the pipeline. One involves casting some things in resin which I’m pretty excited about and the other..I’ll have to show you when it’s done. It’s very creative is all I’m going to say.
Project time – 2 - 3 hours (Not including drying time)
Price – £4 - £15 depending on what you already have at home
Pros
Easy and relaxing
Great way to get more out of your lino cuts
Cons
Clay and paints could get messy
Doesn’t always come out like you imagined!
This was just a little experiment I wanted to try out. We made tiles in art college using our lino cuts, clay and a rolling machine (is that what it’s called!?) and I found the process really satisfying. If you’ve already gone to the trouble of cutting your lino for printing, why not re-purpose it and make the most of your creativity! This isn’t a particularly challenging project and if you have a block you’re really happy with, the results could be really lovely. I have two regrets with this project - one is not printing more tiles so I could experiment with different colours and thicknesses and the other is not making holes so I could turn it into a wall hanging.
Tools
Lino block ready for printing - If you already have one this is going to be a really easy project. If not, I would suggest this kit.
Clay - I used this stuff. I really didn’t get on with it initially but it’s perfect for this particular project. Don’t use it for the clay pots in the plant hanger tutorial though, it’s a nightmare!
Acrylic paint -this set includes a brush
Paint brushes
Rolling pin
Grease proof paper
Knife
Sandpaper or nail file/emery board


If you don’t have a lino cut from a previous project, I suggest you go back to blog post number one to see how I made lino printed postcards at the start of lockdown. The kit I suggest above will have everything you need to make your lino printing block. Lino cuts print the reverse of what is on the block so if you haven’t already made one, I would have a think about the way it will be printed in the clay. If I was carving a block especially for clay, I would have carved away the image, as opposed to carving away the negative space as I did for the postcard design. This would leave your negative space flat instead of the strange lumpy effect I have surrounding the cactus and flowers. But that’s just personal preference. Hope that makes sense!?
Start by rolling your clay out to the thickness you would like your tile or wall hanging to be. I only had a little bit of clay for this project so I rolled to about 5mm. If I had more I think I would have gone for 7-8mm. You don’t need to roll with the grease proof paper but it does help avoid mess and the problem of the rolling pin sticking to the clay.
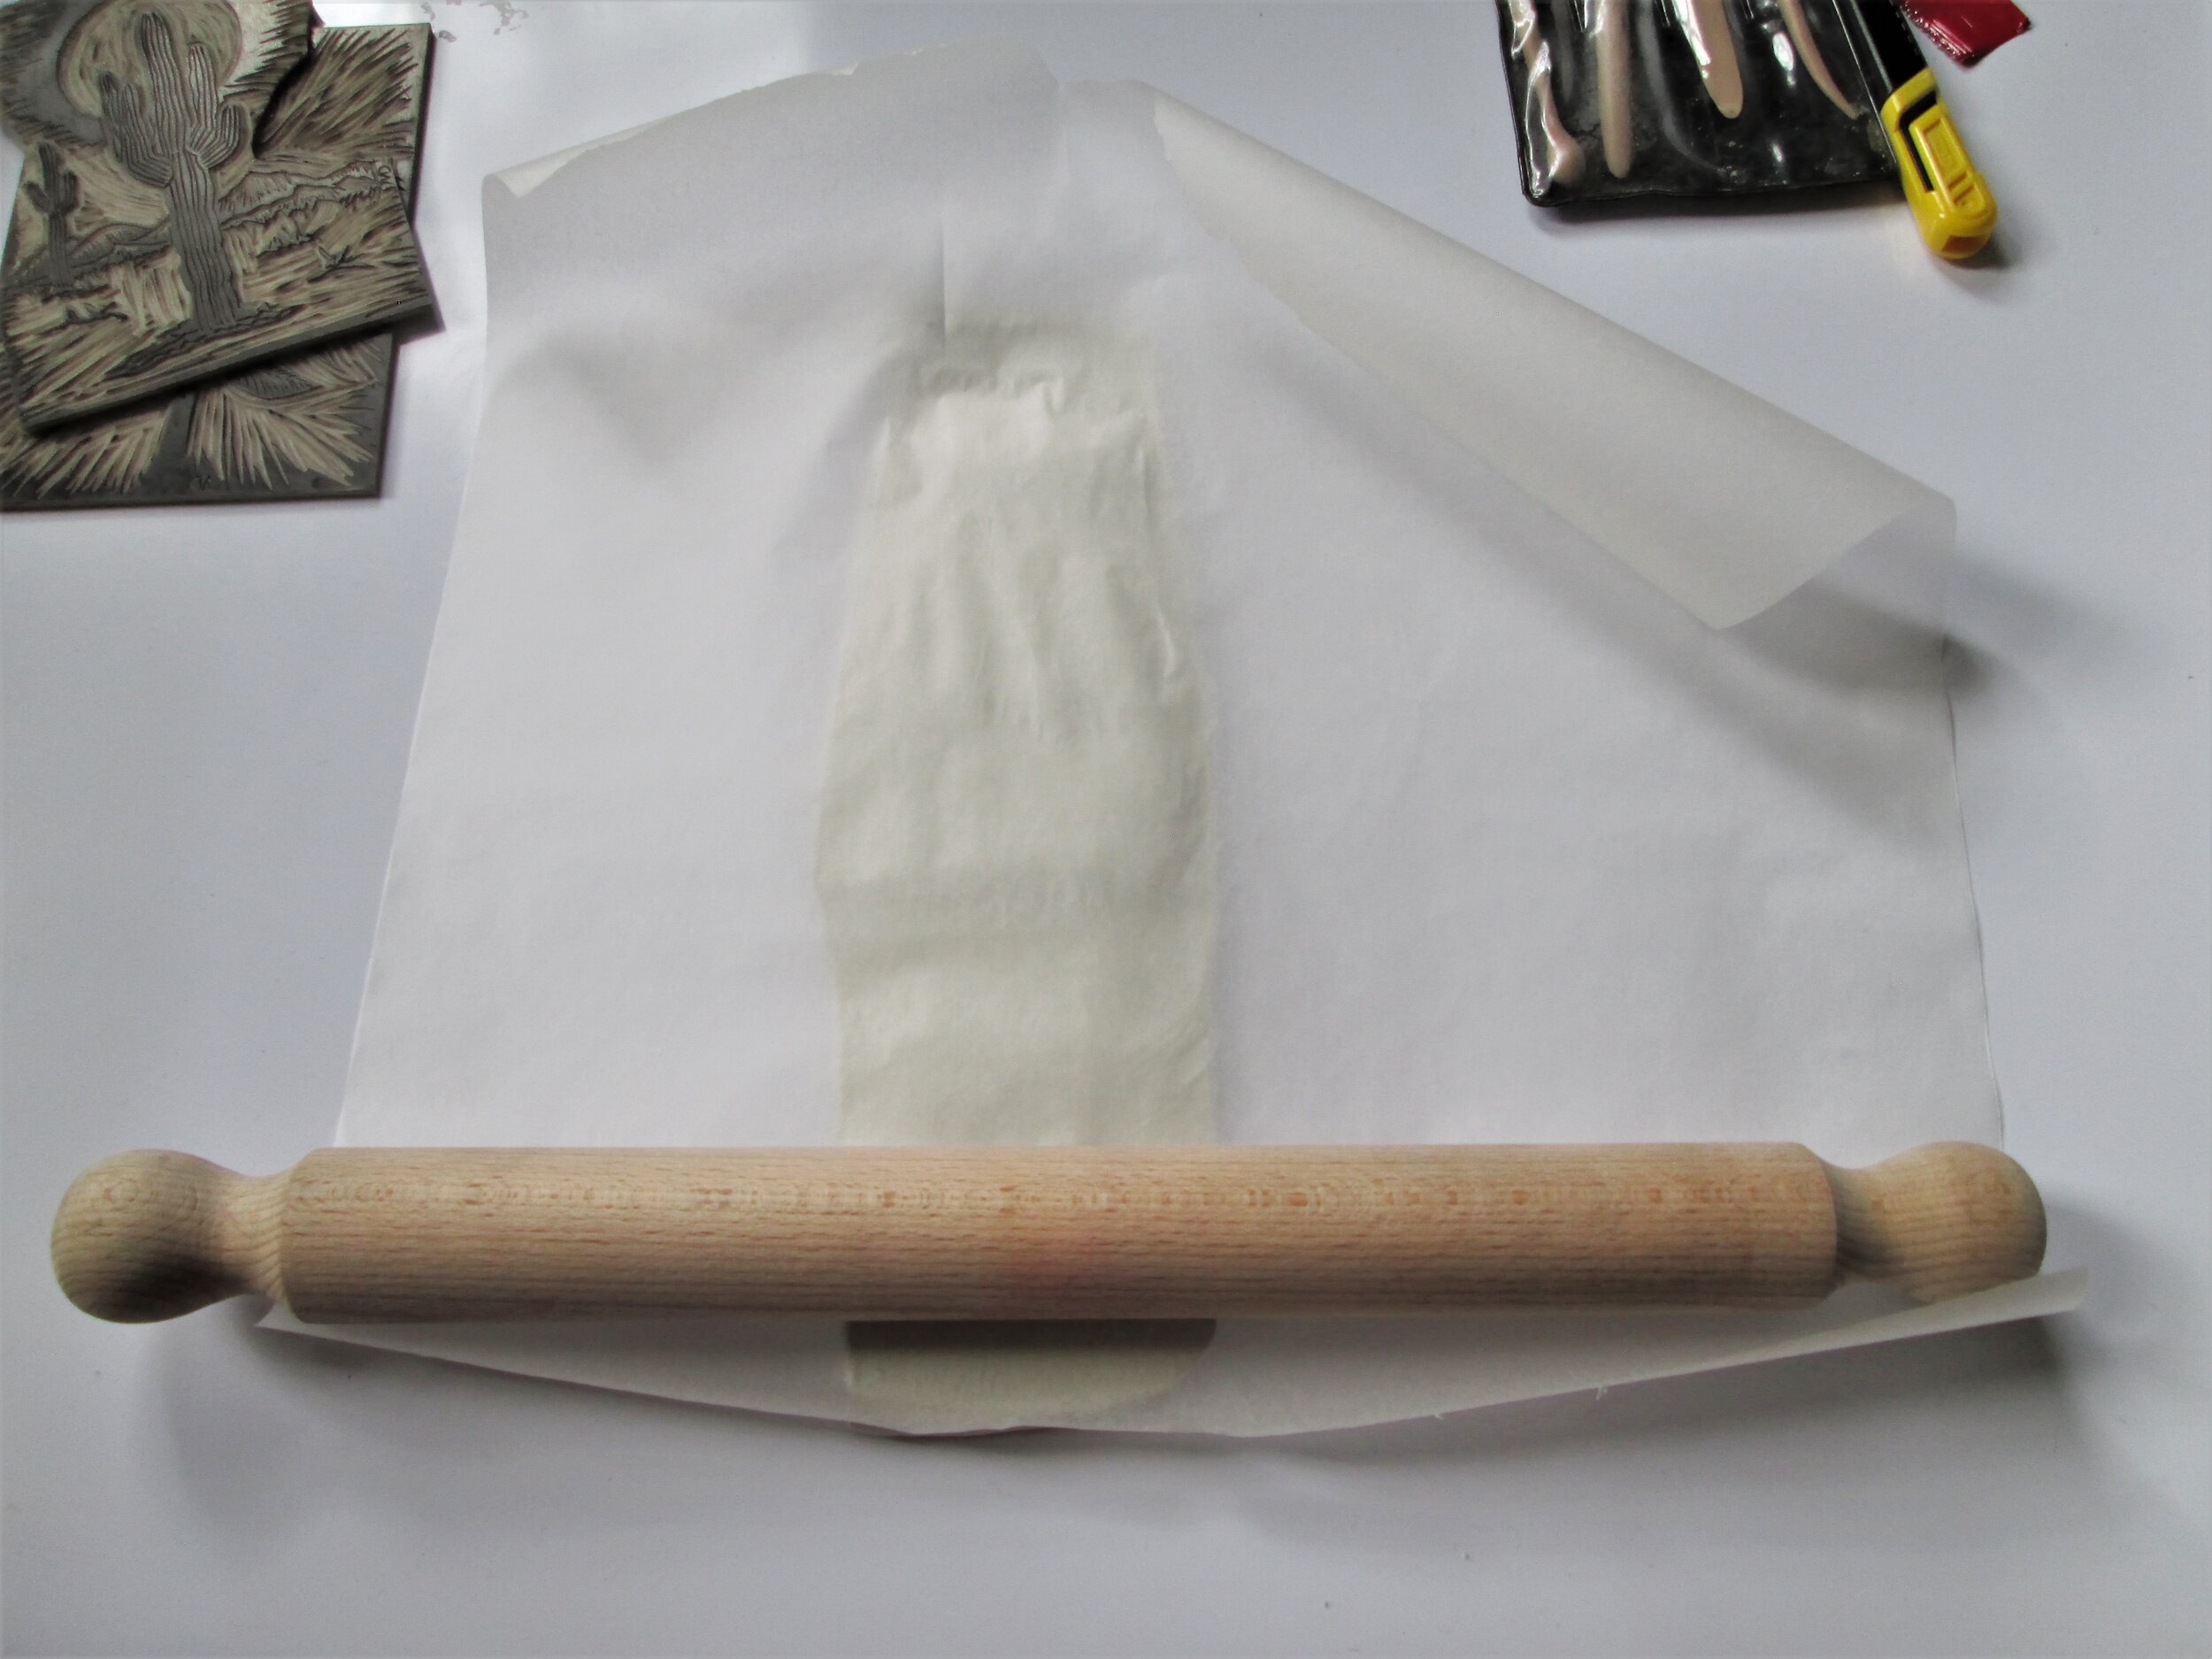

Make sure your block is super clean. I washed mine with soap and water but there was still a bit of ink residue which unfortunately got transferred onto the clay. If you’re using a different type of clay and it’s particularly sticky, you can spray your block with oil spray to avoid it sticking. I did this and it turned out it wasn’t really necessary with Das clay.

When you’re ready, place your lino face down on your clay and roll your rolling pin over the top. Make sure the lino doesn’t move as your rolling as this will give you a distorted print. Also try to apply the same amount of pressure the whole way across or you’ll get a wonky tile.

Peel your lino away and marvel at your imprint! I was amazed at how crisp it came out. So satisfying. Carefully wipe away any oil and cut your tile to size. I printed straight onto a flat, smooth surface and left to dry in situ. If you try to peel it off it will likely stretch and distort, so if you can, just leave it where it is until it dries. Mine took about two days because I didn't want to pick it up and turn it over until it was nearly completely dry. This stopped air getting to the underside and slowed down the process.

Once your tiles have completely dried you can sand down the edges a bit to give them a more finished look. I just used an emery board and it worked fine. Then you can start painting. I used acrylic paints but if you want a really washed out look, I think you could probably use watercolours. Once I’d mixed a few colours I liked the look of, I tested them out on the back of the tile to see how they would come out. The paint absorbs pretty quickly so you will need to do lots of coats to get a even, bold colour.
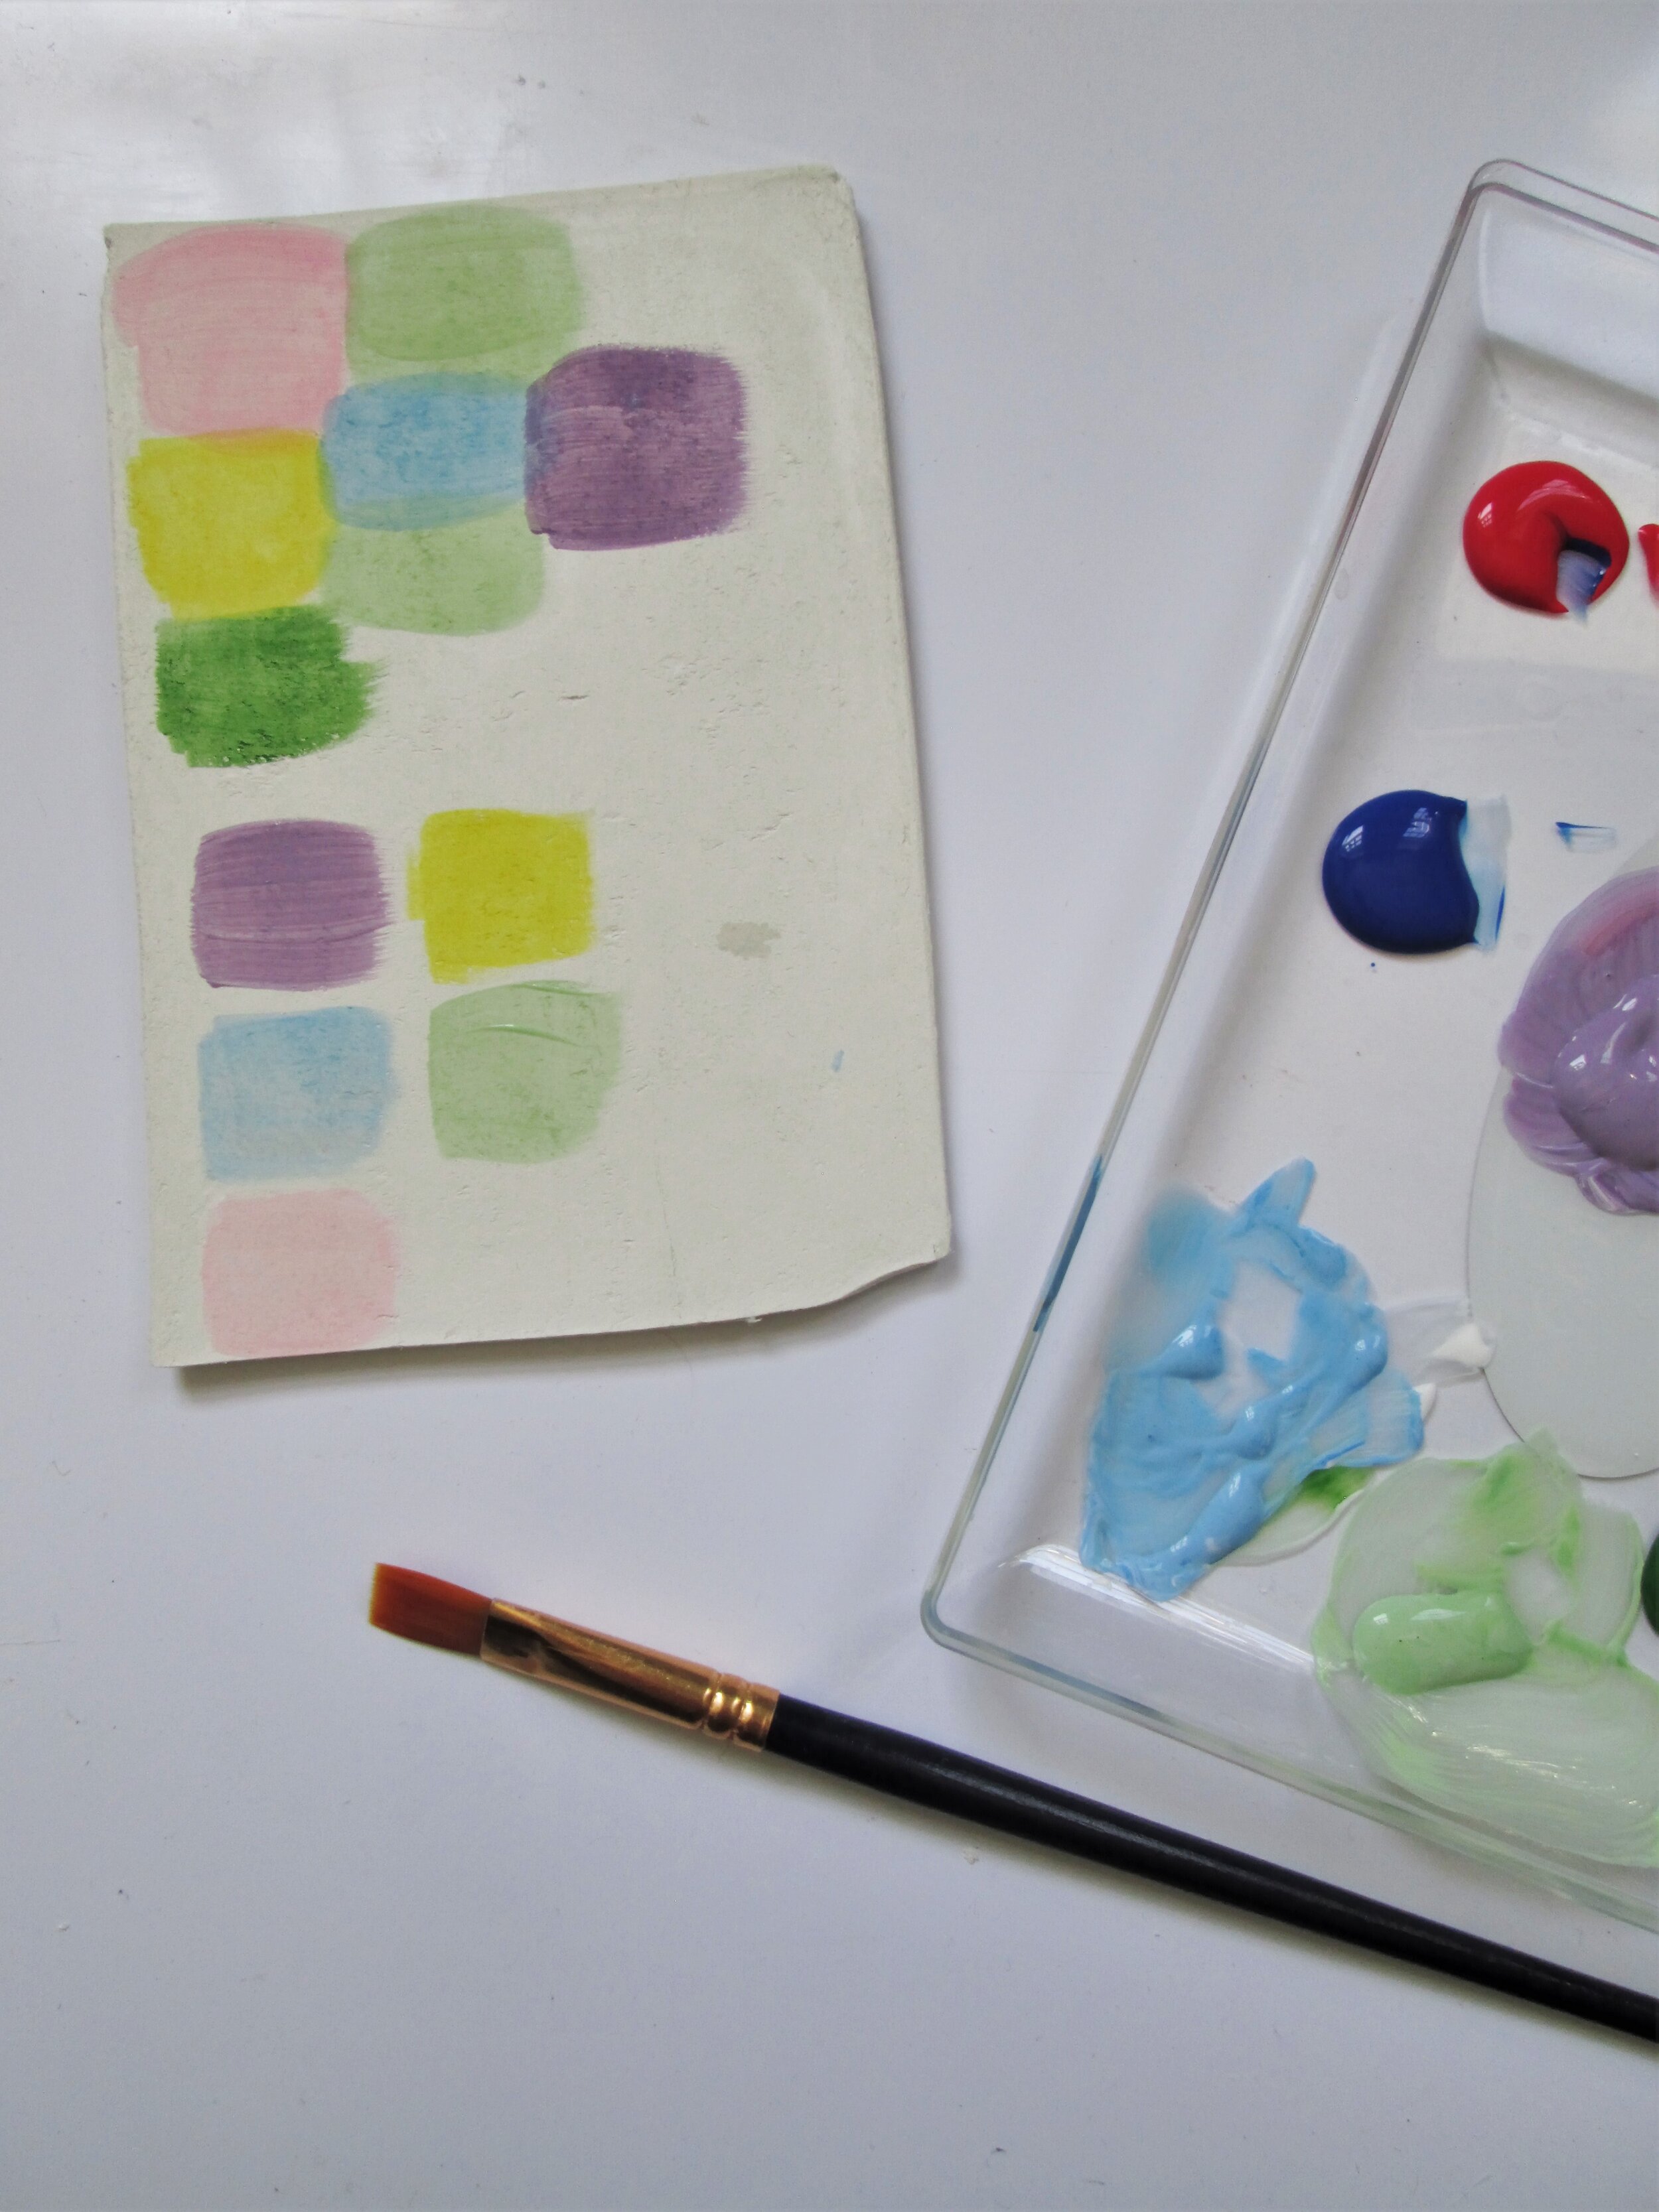

Once I’d settled on the colours, I got painting! I used a bigger brush on the background of my tiles because I wanted a watered down, washed out background. I was really disappointed with the flower design I did because I made the classic mistake of overdoing it. Remember to stop when you’re happy with it!

Leave to dry and you’re done. If you want to turn your tile into a wall hanging, you can make a couple of holes in the top when the clay is still wet and thread some string through when you’ve finished. The pic below is a nice example of a hanging tile. Simple and effective. (I didn’t make this unfortunately, urban outfitters did!)


Sorry this weeks post isn’t particularly technical. But I really think if you have a printing block you love, you could get some beautiful results using this process. I would also think about varnishing your tile when it’s done. That sort of finishing can take your project up a notch and give it a professional finish.